Wednesday, November 20, 2019

80 Meter Vertical Yagi: Completed

From first models to final design to final antenna took three years. It isn't that I was so slow than it was relatively low priority to putting up towers and other antennas. Construction began almost 2 years ago, then abandoned over the winter, and continued in earnest in 2018. When that was done I had a manually switched 3-element vertical yagi. For me that was an accomplishment, and I enjoyed the fruits of my labour over the winter.

What I didn't do last winter was to complete the array. The missing piece was the switching system. Its components include:
  • Switchable L-networks for the yagi and omni-directional modes
  • Tuned, parasitic element switching system: off-line; director; reflector
  • Switching matrix: diode array to select relays for the selected mode and direction
  • Control unit: manual switch in the shack to select mode and direction
All that work is now complete and the antenna is fully operational. Barring any repairs due to construction errors the antenna is complete. It works and it's a lot of fun to use. With this project out of the way I can concentrate on raising yagis, weather permitting.

In this article I'll step through the construction, testing and tuning. After reading this you'll likely wonder why I didn't build a 4-square with a commercial control system. Good question. For now I will only say that I enjoy designing and building antennas -- as should be evident from this blog. This antenna is an interesting and economical way to an 80 meter array with gain. I've made progress since the day it was little more than a giant pile of parts.

Parasitic element switch boxes

When I first tuned the parasitic elements and successfully rigged the antenna as a yagi I gathered sufficient data on the ground and on the air to ensure performance would be in accord with the design. Over the winter I gathered parts and refined the design of the switch boxes. Only then did I proceed to build the switch boxes.

The units are almost perfect clones. That is important to achieve near identical behaviour in all 4 directions. The coils were designed by software and a prototype was built. It was modified until it exhibited the exact required frequency shift -- from 3680 kHz (director) to 3450 kHz (reflector) -- when installed at the monopole base. With one working to my satisfaction I built the other 3 to the same specifications and confirmed that they behaved identically.


Box details are shown in the two above pictures. A few points about the design are worth mentioning:
  • Coil Q is not critical since the loss is low. Even at a kilowatt the estimated dissipation is less than 10 watts, and perhaps a little more due to dielectric heating of the PVC form. Insulated solid AWG 14 THHN wire is used. The insulation prevent winding shorts and ensures consistent winding pitch.
  • Wire routing and gauge is roughly identical to ensure all conduction path lengths are equal, and therefore frequency shifting is identical. AWG 18 wire is used for RF, which is easy to work with and more than sufficient in these short lengths to handle high power.
  • Stainless steel fasteners provide the studs for the monopole wire and radials. A solder lug is placed under the screw head inside the box.
  • The relays are sealed SPST-NO 12A in a PCB mount package. They are inexpensive when purchased in quantity. The pins are directly soldered, with the wire providing mechanical support. These relays are perfectly good when placed in a low impedance (hence low voltage) antenna point, just as they are in antenna switching products. When the element is floated the voltage across the contacts of the bottom relay is very low since the element is non-resonant. This was confirmed using EZNEC.
  • There is a hole in the bottom for the Cat5 cable and a pair more for the cable tie to hold it in place. These holes double as weep holes for moisture. The coloured wire pairs connect to a small terminal strip. If corrosion is a concern the screws can be coated with dielectric grease. Don't use silicone or other heavy duty gunk or you'll regret it when it comes to maintenance.
  • The boxes and coil forms are PVC. They are UV resistant and the box has a rubber gasket. The small 4" × 4" × 2" size is perfect for this application.
The boxes are mounted on a short length of scrap pressure-treated lumber which is turn is clamped to ~1 meter of rebar that is pounded into the ground inside the round PVC pipe that serves as the radial hub. You can study the physical construction in the picture below.

Holes are drilled into the wood to serve as a strain relief for the wire element. This is more reliable than wiring it directly to the box.

A length of wire beyond the connection point allows the element to be lengthened when more radials are added, which will raise the resonant frequency. The wire stub does not affect element resonance or performance if it's short with respect to wavelength; I tested this with up to 40 cm of wire stub with no problem. The end is pushed through another hole in the wood to keep it from coupling with the radials (and lawn mower blades).

Element tuning

While testing an element all the other elements, including the driven element, are floated; that is, disconnected from its radials and, in the case of the driven element, the transmission line.

A 9 volt battery powers the relays. Modern sealed relays with a 12 VDC coil reliably close with as little as 8 volts. The battery is small and portable, ideal for this testing in the field. Check the voltage periodically since it will wear out powering many relays.

Clip lead length does not affect tuning since DC common is isolated from antenna ground. The extra wire needed to insert the antenna analyzer between the radial hub and the box does matter. On 80 meters the frequency shift is ~10 kHz for every 6 cm of wire. The effect of the extra wire is therefore predictable and can be compensated for during tuning. For the best impedance measurements the analyzer should be connected on the radial side of the box.

All the coils were individually tested on one parasitic element to ensure they shifted resonance from 3680 kHz (director, with the coil shorted or out of circuit) to 3450 kHz (reflector). The same coil location and wiring topology in all boxes (see above) ensures identical behaviour of the elements.

With predictable coil performance all I had to do was adjust the monopole wire length to set the resonant frequency. The bottom relay connects the radials to the monopole through the coil to make the element a reflector, and floats the element when not energized. Energizing both relays -- ground the element and short the coil -- the element is a director.

The tarp provides a clean surface for tools, equipment and small parts. It further reduces the risk of ticks which are quite common here from May to July.

Tuning proceeded surprisingly well. All the elements achieved the 230 kHz resonance shift within measurement error. Using the 6 cm per 10 kHz rule mentioned earlier each element took only one or two adjustments. For example, to raise resonance from 3420 to 3450 kHz a knife is used to remove insulation 18 cm up the wire and then reconnected to the box.

The driven element resonated substantially lower than before due to the new longer stinger. Without a matching network the driven element has an SWR below 2 from 3.5 to 3.8 MHz. The resistance ranges from 29 Ω to 34 Ω and the resonant frequency (X = 0 Ω) is 3680 kHz. That this frequency is exactly that of a reflector element is purely coincidental is irrelevant to antenna behaviour.

Switching matrix

Direction is set from a control unit in the shack by placing +12 VDC on one wire and common. The control cable is Cat5 rated for UV and direct burial, in the same trench as the LDF4 Heliax transmission line. The power supply is 13.8 VDC which will be lower at the antenna. Voltage drop is due to the switching diodes, RF chokes and AWG 25 conductor resistance.

In some instances it may be helpful to draw up a voltage budget to ensure that switching systems work as expected. You can often get away with smaller gauge wire -- more economical -- than may be specified for commercial products.

Although I have yet to measure the voltage at the relays they are rated for full closure down to ~8 volts and there is no problem. Testing and tuning with a 9 volt battery in the field worked well, even as the battery aged and sagged down to 8.5 volts. 


The prototype board on which it is built is sitting on the circuit diagram. The 4 wires at the bottom are for direction selection: NE, SW, SE NW. Each side of the board is for a pair of opposite elements, with the 2 wires destined for the parasitic element switch boxes, one for grounding the element (make it active) and the other to short the reflector coil (make it a director). The other 2 elements are floated to be non-resonant and therefore inactive (no induced current).

The small components are 1N4148 switching diodes. The larger ones are RF chokes, one on each line to the shack and one on each line to the parasitic element switch boxes, so that all lines in and out, including the common, are choked; there are more chokes elsewhere.

The chokes reduce the risk of RF on the control lines which could affect the array and control software and EMI due to rectification of RF by the diodes. EMI protection is desirable on the shack end of the control lines although I do not have that as yet since there is no ill effect during use.

The diodes double as back EMF protectors when the relay coil voltage is interrupted. The common lines -- one to the shack and one to each parasitic element -- are also protected by RF chokes but are not on the PCB. The top diodes on the board select the L-network configuration. Antenna impedance is different for yagi and omni-directional modes. More about that in the next section.

The switching matrix is installed in a large PVC box installed at the base of the driven element. Content and wiring of the box is discussed below.

L-networks

Designing L-networks is easy using TLW (comes with the ARRL Antenna Book). All you need is the impedance of the antenna, which is best determined by measurement not the software model. As much as I and others heavily use computer modelling the impedance calculation for verticals and their radials over real ground with its variable composition, the model isn't sufficiently accurate.

Modern antenna analyzers come to the rescue. Use one of suitable quality and accuracy and the job of L-network design and tuning will be easier. My weapon of choice is the RigExpert AA54.


With the parasitic elements tuned and their switch boxes installed and operating the entire array can be configured from the control lines at the base of the driven element. Using a battery and clip leads I manually run through the parasitic element modes. When the array is unpowered it is in omni-directional mode and tuned for the CW end of the band.

Impedance was measured and recorded in 25 kHz steps from 3.5 to 3.65 MHz in all 4 yagi directions and every 50 kHz from 3.5 to 3.8 MHz in omni-directional mode. Recall that the yagi functionality is, at present, only available for the bottom 150 kHz of 80 meters. I wrote all R and X values on paper, which I find is more convenient than pulling the data from the analyzer onto a computer.

The impedance is not the same for all yagi directions despite the care taken in tuning and radial layout. There is a small amount of asymmetry due to construction and (very likely) lack of homogeneity within the mass of soil and rock across the 1 acre of land the antenna encompasses.

The reactance among the 4 directions is very close but the resistance at any one frequency varies a few ohms. That seems small but when the R component of the impedance is 15 Ω a difference of 2 or 3 Ω is proportionately large. It impacts the impedance curve among the 4 directions. In practice the SWR deviations aren't problematic (measurements further below).

With a full set of measurements in hand I played with TLW. My objective was a set of C and L values that would be convenient for switching among modes.


The basic L-network for the yagi modes is as calculated above. The impedance is an average among the 4 directions. The result is a low SWR across the CW segment and acceptable for the digital modes up to 3650 kHz. Yagi performance is degraded but still effective up to 3650 kHz.

As it happens I have a coil already wound, once I trim it down to size. Using K6STI's most recent Coil program my coil with 1" diameter and 6 turns per inch needs to be 1.9" long and will have a Q in line with TLW's estimate for loss. The coil is tapped approximately halfway along for an inductance of 0.75 μH which is needed to improve the SWR in omni-directional mode for SSB.

For the shunt C I use two 1200 pf capacitors in series to give 600 pf for omni-directional mode, one of which is shorted for yagi mode. Each capacitor is a vintage 1000 pf mica transmitting capacitor in parallel with 100 pf high voltage, low RF loss and zero temperature coefficient disk ceramic capacitors. Due to their relative values when in parallel the mica capacitor carries the bulk of the current, for which it is better suited.

The carefully engineered compromise of L-network components results in low SWR in all modes, including omni-directional SSB. Interestingly the SWR in omni-directional mode dropped to well below 2 without an L-network after I rebuilt the stinger. The reason is that the resonant frequency dropped to 3650 kHz due to its longer length. Of course the R value is low enough that impedance transformation remains worthwhile.

During final tuning I found that I could not achieve an SWR below 1.5 for the yagi modes. After making a few measurements and testing alternatives with TLW I added two 100 pf capacitors to the shunt capacitor (the other series capacitor is shorted in the yagi modes). Only one was needed to drop the SWR to 1 at the design frequency of 3550 kHz.

Frequency of minimum SWR differs among the yagi directions due to impedance differences among the elements. Since the SWR is between 1 and 1.2 at 3550 kHz it is inconsequential. The SWR at the edges of the design range -- 3.500 and 3.650 kHz -- is about the same since it is dominated by the large resistance and reactance change. This is typical of antenna matching networks.

The SWR curves are displayed further below. They were measured after the L-network adjustment complete.

A negative consequence of the L-networks is that the antenna no longer works on 30 meters. The topology acts as a low pass filter that has a high SWR above 80 meters. I chose the network topology to reduce inter-station interference during contests. The 80 meter inverted vee through the rig's ATU works well enough on 30 meters to be an interim solution.

Control box

I purchased a 6" × 6" × 4" PVC electrical box to house the switching matrix, L-networks and cable terminations. It sits at the base of the driven element (tower). External connections are for the coax, driven element RF connections, control cable to the shack and control cables to the parasitic elements.

The 5 Cat5 (8 conductor) cables pierce the wall of the box and are routed to the barrier style connector strips. On balance I deemed this approach better than connectors with respect to waterproofing, convenience, cost and labour. It requires some care in the layout to make it work well. The picture is of the completed box before being installed and the cables attached.


Yes, it does look messy! Despite that it works quite well. The relays are very lightweight and can be supported (suspended) by the solid connecting wires for RF. Control wires are separated from the RF section (bottom and lower left) to minimize interaction even though coupling with short wires at 3.5 MHz isn't a serious problem.

The control wires are made as long as necessary and RF wires are kept as short as possible. The photograph makes the depth look shorter than it is; there is more vertical separation than is apparent.

Layout detail:
  • Switch matrix is on the right wall. One screw with an insulated spacer supports it.
  • Connector strip for the control cable is on the bottom. Every terminal is labelled. The blank line carries +13.8 VDC to allow testing on site without need for a battery.
  • Labelled connector strips for the control lines to the 4 parasitic elements are at top centre. Chokes for the common lines and reverse EMF protective diodes for the 3 internal relays are between the strips.
  • Holes for the control cables (5 of them) are at the lower right. There are barely visible due to the camera angle. There are additional  holes for tie wraps to hold the cables in place.
  • There are 3 stainless studs at the bottom. From left to right they are for the driven element monopole, radials and 160 meters. Again, these are not easily seen due to the camera angle.
  • Coax connector (N) is at the lower centre of the left wall.
  • L-network series coil with taps for yagi and omni-directional modes. The relay just to its bottom right shorts the lower coil section for omni-directional SSB use.
  • The relay above it shorts one of the series L-network capacitors for yagi use. The capacitors are large transmitting mica with a few 100 pf 1 kV parallel high-Q ceramic capacitors. These are partially hidden by the coil and relay.
  • The DPDT relay at centre bottom directs output of the L-network to either the driven element or the 160 meter stud. The 160 meter option will be described in a future article after it is added to the antenna.
High value carbon composition resistors will be added later to drain precipitation static to the radials and ground from the driven element. It is a minor concern in our cold winter so it can wait for spring. The lightning protection system will be added at the same time.


The picture shows the completed box attached to the driven element and with all cables connected. Despite being even messier with the cables attached it was straight-forward to wire and test. The bracket that holds the box to the tower needs to be replaced with a piece of lumber for improved mechanical support.

Colour coding is standardized with colours written on labels inside the box and documented in my files. Make sure you do this since you won't remember (trust me on this). There are 24 control lines: 8 to the shack and 4 to each parasitic element. After considering options I opted to install short cables to the internal terminal strips, which could be down indoors in comfort. Crimps on the outside of the box to attach them to the 5 cables.

It took a couple of hours in the field to get it all connected, tested and temporarily weatherproofed. For maintenance that requires box removal it is inexpensive and quick to simply cut the lines and reattach them later. I will use connectors for the external connections if maintenance and antenna improvements occur more often than currently anticipated.

Impedance tuning of the antenna

The antenna has 7 operating modes: 2 omni-directional modes optimized for CW and SSB band segments; 4 yagi directions; and 160 meters. The last is not yet implemented. That leaves 6 modes to be matched to the 50 Ω transmission line.


With the L-network installed the initial tuning could proceed. First to be done were the CW and SSB omni-directional modes. These did not require manipulating the control lines to the parasitic element, which were left disconnected and not yet routed into the control box. As before a 9 volt battery was used. The taps for the full coil (CW) and SSB were adjusted until the SWR curves were optimized.

The coil is at least 50% longer than needed. It was pulled out of my junk box and I didn't bother shortening it to give me more tuning room should I ever need it. The coil values calculated with TLW are approximately 1.5 μH for CW and 0.75 μH for SSB. Based on the coil dimensions the taps ended up not far from these values.

The shunt capacitor should be approximately 725 pf for CW and 500 pf for SSB. Instead I fixed it at about 600 pf for both band segments; that is, with the two 1200 pf capacitors in series. One of them is shorted for yagi modes since its shunt capacitor is calculated to be in the range 1150 pf to 1300 pf. The range is due to the impedance differences among the 4 directions as previously noted.

The component choice allows for a minimum of alterations (by relay) among modes. The design was intentional in this regard to keep the switching as simple as feasible. This is an interesting topic on its own which I may cover in a future article.


The SWR curves for the omni-directional modes are very good. They cannot both be perfect since it is only the value of the series inductor that changes, not the shunt capacitor. Adjusting the capacitor value would help little since although it would bring the minimum SWR to 1 the tails of the SWR curve would be about the same. This is typical since as you move away from the centre frequency the R and X departures from the ideal dominate the impedance.

With that done I connected the battery to the parasitic element control lines to adjust the L-network for the yagi modes. There is variation among the 4 directions due to the aforementioned parasitic element impedance differences. Rather than show all of them here is just the one for northeast. The others are similar or better.


Per the design the SWR soars at the 3650 kHz upper end of the design range. This is unimportant since the gain and directivity decline rapidly above 3625 kHz.

With the L-network adjustment complete the box was brought indoors to solder the coil taps and install the parasitic element cable harness (see below). After reinstalling the box there was a problem. A clip lead to the radial hub was used during L-network adjustment. When I replaced this with a permanent wire the SWR for all modes increased since it was shorter. It was far earsier to increase the wire length than adjust the networks. Wire length matters.

The SWR plots were done in the shack not at the antenna. Out in the field I forgot to save the analyzer plots and I didn't want to brave the cold and redo the weatherproofing just for this article. The SWR curves are more nominal at the other end of the 300' transmission line. The difference is probably due to a deviation from 50 Ω in a section of old RG213. Attenuation is very low at 3.5 MHz and thus contributes less to the impedance difference at the shack end of the transmission line.

Component choices

There are not many types of components in the switching system and networks. Judicious choices are necessary to ensure proper operation and reliability. Some of what I needed comes from my extensive junk box. Other components were purchased. The price is low when you buy in bulk from the major electronic component outlets. Most of these were purchased from Mouser and there are many other sources with good reputations and prices that also make it easy to do business with them in Canada.


  • The 1N4148 switching diode is used throughout the switching matrix. They are cheap, small and effective. They double as back EMF protection for the relays they power. While not ideal in this latter application I was willing to take the easy route. Others use them in similar antenna systems with good results.
  • For relays not powered by the switching matrix I used 1N4007 rectifier diodes for back EMF protection. They are more robust than the 1N4148 and indeed are overkill with their 1 kV reverse voltage rating. I had them on hand so I used them.
  • Old 1000 pf mica transmitting capacitors in combination with parallel 100 pf disc ceramic capacitors make up the two 1200 pf series capacitors in the L-network. These are stable and can handle a kilowatt of power. The 100 pf capacitors are 1 kV, low temperature coefficient and the ceramic material is low loss at RF. They each carry about 10% of the antenna current since they are in parallel with 1000 pf mica capacitors.
  • The RF chokes (lower right) are rated for 600 ma and are resonant at 6 MHz. The current capacity is well above the draw of the one to three relay coils they each support. The series resistance of ~1.5 Ω has negligible voltage drop in my control system. It is important that the self-resonance of the chokes be outside of amateur bands to ensure they perform properly.
  • The TE Systems 12A SPST-NO relays do the bulk of the switching chores in the L-network and parasitic element switch boxes. Both sides of the Omron G2RL DPDT relay switch between 80 and 160 meters at the output of the L-network to double the contact rating. All the relays are small, sealed and reliable up to a kilowatt. This type of relay should only be used for low impedance switching since with high impedance the RF voltage is too high. For those applications use vacuum relays or relays with a large contact gap.
  • PVC pipe as a coil form is acceptable at 80 meters but not for QRO above 20 meters or so. Loss (heat) in most PVC formulations rises with frequency and becomes a problem. I use PVC forms and insulated (THHN) wire in the parasitic element coils to achieve dimensional uniformity. The L-network has an air core bare wire coil from my junk box. Bare wire is handy for tapping the coil to adjust the impedance match.
  • Internal RF wiring in the 5 boxes is AWG 14 and 18. Smaller 18 gauge wire is acceptable despite the high RF currents since the lengths are short and ohmic loss is negligible. The dead bug construction method favours small gauge wire connections to the relays.
Control unit

The cutouts for the 80 meter array were included in the manual antenna control unit when it was built. A 6-position rotary switch and toggle switch do all that is required in the present antenna configuration. The only design question is which direction and mode to assign to each position.

When unpowered the antenna is in omni-directional mode with SWR optimized for CW (see L-network discussion above). For switching convenience I placed the CW omni-directional mode between the 160 and yagi position. Since the most common yagi directions are northeast (Europe) and southwest (bulk of the continental US) they are the adjacent positions. The less common directions are in the furthest clockwise positions: southeast (southeast US, Caribbean and South America) and northwest (Japan, east Asia).


During CW contests antenna mode and direction requires one one click most of the time. This is usually between northeast and southwest, with occasional forays to southeast, and rarely to northwest except grey line openings to Asia.

For SSB contests there are only two choices, both omni-directional modes with SWR optimized over different band segments. Most often the SSB switch is the only one needed; set once and forget unless you want to "rest" the L-network relay when 80 meters isn't in use.

As currently configured the SSB switch position disables the rotary switch. This works since the only SSB mode is omni-directional. Should I add SSB to the yagi modes the wiring must change so that the mode selection would select (short) coils in the 4 parasitic elements to move the centre frequency from 3550 kHz to 3700 kHz or thereabouts.

A wiring error among all the cable harnesses reversed the SE and NW directions. I'll have to track this down. I could reverse the wires in the control unit except that would violate my Cat5 colour coding and invite future confusion. There is no rush and there is no great consequence during use. Apart from this one error the control unit works perfectly.

Grounding

With the driven element, parasites, radials and control system isolated from physical ground there are a few challenges implementing lightning protection. Although this region has a lower risk of lightning strikes than many other protection is still required. After all, an 80 meter full size vertical sitting in the middle of a hay field can be a very attractive place for a lightning channel to form.

There are two problems to be addressed: lightning strikes and precipitation static. For a direct or secondary strike I want an easy path to ground for the lightning current despite the antenna's isolation from ground in normal operation. The electronics are unlikely to survive and are easy to replace, but I do want little of the strike current reaching the shack ~100 meters distant. Precipitation static needs to be continuously bled to ground to avoid excess receiver noise when it rains or snows.

For both problems ground rods are needed. To drain static it is enough to place a high value resistor between the antenna elements (including the radials) and ground rods. The typical method to deal with direct and secondary lightning strikes is with two copper balls separated by a spark gap, one on the driven element and one on the ground rod.

I hope to implement both solutions next spring before summer storms arrive.

Performance

Does it work? The short answer is yes. There is close agreement between what the computer model predict and how it performs on the air.

This is not a "perfect" antenna and it was not designed to be. Its performance pros and cons are quite interesting. This article is already long enough and I would like more experience using it before writing it up for the blog. Perhaps in December, after CQ WW CW and when the weather forces an end to tower and antenna projects this year and I spend more time indoors.

Summing up

For someone who enjoys playing with antennas this has been a fascinating project. I've learned a great deal and I've gained an effective directional antenna on 80 meters. I will continue to monitor its performance over the winter in contests and daily DX chasing. The future of the antenna will then be decided.

I definitely plan to add 160 meters to it, per the design and construction. It won't be difficult and will be an interesting project. I may in time want to add SSB to the yagi modes, something that isn't possible now due to the narrow bandwidth (less than 150 kHz) of the yagi. It will require changes to the parasitic elements and control architecture; the control lines are already installed.

What is particularly interesting is how the yagi's performance compares to the popular 4-square that is used in many big gun stations. The major differences I knew before starting this antenna project. Now I'd like to make the comparison quantitative, for my benefit and for readers. It will be enlightening.

Thursday, November 14, 2019

Abrupt Change of Season

The best laid plans are no match for Mother Nature. November has been less than kind in this part of the world. November began cold and windy, then came the snow. So far we've had 25 cm of snowfall. It isn't melting. Temperatures have gone as low as -17 C with wind chills even lower. Records have fallen. One wind storm brought gusts well above 100 kph that had the house shaking. After the sun rose I saw that all the towers and antennas survived.

Some moderation is in the forecast though not what it should be. Normal highs in early November range from 8 C to 6 C. This is comfortable for antenna and tower work. My plans relied on weather that did not vary too far from the expected. Now I'm faced with this:


In the foreground is one of my new 20 meter long boom yagis. In the background is one of the 15 meter yagis. A second 15 meter yagi is buried in the snow and can't be seen. These are 3 of the 4 big yagis for my 15 and 20 meter stacks for the newly completed 140' (40 meter) high tower in the background.

The frustrating thing is that the antennas work. They've been tuned and tested. All that's needed is the permanent gamma match assemblies, mounting hardware and boom trusses. Despite progress of all of those it is unlikely that these antenna will be raised in time for CQ WW CW which is rapidly approaching.

However it is not all bleak. With a moderation in the weather (likely) the side mount yagis will be completed and raised. The tower brackets are ready to go and the tram line is in position. Most of the truss hardware is ready to be assembled. Heliax feed lines are in the midst of assembly and testing. All of it looks good.

With these pointed at Europe I will have more capability in upcoming contests. If I get lucky the mast can be raised and the rotatable yagis can be lifted onto the mast. These operations require less snow on the ground to allow a power lift: they're too heavy to be trammed by muscle alone.

My 40 meter rotatable dipole project is similarly on hold. In fact I have not assembled it although all the material is on hand. This is an impediment for chasing distant multipliers on 40 meters since I moved the XM240 from its previous 46 meter height down to 21 meters. On the positive side this antenna should not be too difficult to raise. All that will be needed is to build and tune the gamma match. The transmission line and rotation loop are ready for use.

For now I do what I can on the ground and hope for better weather. Failing that I am forced to wait until spring. Around here that means at least 5 months (April) and possibly May. June through mid-August is haying season when little work on the big towers is possible.

Saturday, November 9, 2019

Thoughts on Two Keyboard SO2R

In the ARRL Sweepstakes CW contest last weekend I operated SO2R using two keyboards. This was a first for me. Several months ago I purchased a wireless keyboard and mouse so I had the keyboards ready to go.

SO2R (single operator, two radios) is used by skilled contesters to maximize their score. This comes at the expense of mental fatigue and a difficult learning curve. It is possible to practice offline with running simulators such as Morserunner, yet that is no substitute for reality, especially if you have a small station and need to S & P (search and pounce) quite a bit.

Among SO2R aficionados there are those who use one keyboard and those who use two. Both can work well, and you'll find a mix of techniques among the top contesters. The differences are many yet, I believe, can be roughly compared as follows:
  • One keyboard: Less physically fatiguing since you hover over just the one keyboard. It can be more mentally fatiguing since you rely on special keys to change radio focus, carefully monitor the display to confirm radio and QSO state, enter what you hear in the correct radio window, deal with out-of-pattern situations such as requesting or responding to fills, etc. Once you become skilled the mental fatigue declines.
  • Two keyboards: More physically fatiguing since you literally constantly switch between keyboards for each QSO state. Fatigue can be reduced with software features to direct commands from a keyboard to the other radio, automatic CQ, etc. With practice there is an improved economy of motion that reduces physical fatigue. Mental fatigue is lower since focus in determined by keyboard use without the needs to use and monitor radio and QSO state.
Now that I've done it I've gained an appreciation of two keyboard SO2R. My software of choice is N1MM Logger+. Some of the other popular contest loggers also support two keyboards. Because my experience is limited to N1MM my discussion of its pros and cons may not be entirely application to other contest loggers. Some of the quirks that I encountered using N1MM two keyboard SO2R may be bugs -- yet to be confirmed -- so I won't dwell on them here.

Operating desk

My operating desk for Sweepstakes was as shown below. The photo was manipulated to reduce the screen brightness, which unfortunately does not help much! Those familiar with N1MM should recognize the two entry windows at the centre bottom and their respective band maps at either side. The other windows I have open are not pertinent to SO2R.


When I use one keyboard it is in front of the display. The paddles and mouse would be on the right of the keyboard since I'm right handed. With two keyboards placing them between the keyboards worked the same for the left radio and required a bit of arm crossing when on the right radio. My manual headphone switch is behind the paddles. The manual antenna switch is on top of the right radio.

Compare this with a photo of my single keyboard setup and an explanation of my home brew headphone switch. Many operators using one keyboard, SO2R or not, persist in putting it in front of the radio and the display up above. Disadvantages include arms and hands dragging on the keyboard when operating the rig and constantly having to tilt the head up to look at the display. I keep the display low so that my head and neck stay relaxed and keep my reach to rig control unencumbered.

You have to touch the rig less than you might imagine. The exception is small stations since you must spin the VFO for S & P. With N1MM and other contest loggers there are a host of keyboard shortcuts for many rig features that, as you learn them, require far less manual control of the rigs.

Those with rigs with full software interfaces (e.g. Flex) and advanced station automation have no boxes and physical controls to deal with; the operator uses the keyboard or mouse. The typical setup for those stations is to place two or monitors side by side. For SO2R with two of these rigs there would be two PCs and therefore two keyboards. SDR rigs with two slices can share one PC and one keyboard.

Which is better for the SO2R novice?

As already mentioned, many of the top contesters continue to do SO2R with one keyboard and suffer no deficit in their results. For the experienced contester who is a novice at SO2R the choice can make a significant difference. Having tried both my tentative conclusion is that two keyboards is the better choice for the SO2R novice.

The major challenge with single keyboard SO2R is the steep learning curve. There are many balls to juggle and quite a few mistakes will be made. Although the software will usually put the typed call and exchange in the correct window each radio's QSO state and software focus must be constantly monitors and keys pressed to change focus as needed. Alternatively you can explicitly send commands to the opposite radio. Keeping it all straight takes practice, a lot of practice.

With two keyboards you can get started and be quite productive with far fewer critical operations to remember and use. Rather than change focus or direct commands you simply manipulate the keyboard associated with the desired radio. This comes at the cost of swivelling more in your chair and its attendant latency.

Another aid for novices is to use low power or even QRP as I did during Sweepstakes. The lower rate and lower value of dual CQing keeps the stress to a minimum. There will be fewer moments of intense activity. Another suggestion is to try SO2R in small and regional contests (e.g. QSO parties) where the activity level is lower or intermittent. By keeping the stress low while you learn you'll have more fun as you hone your skills.

Once you get the basics mastered you still have access to and can use keyboard controls to direct commands to the other radio. For example, to repeat an exchange on the other radio you can direct a command (CTRL-F2 in this case using N1MM) from the same keyboard you are entering info you are copying on the other radio. By cutting out some of the swivelling you reduce fatigue as your skills improve.

In time you may opt to switch to single keyboard SO2R. Choose which works for you. My suggestion is to try both rather than assume that one or the other is better. Keyboards are cheap and you probably have a spare collecting dust.

Go with wireless keyboards to reduce demand for limited USB ports (hubs don't always work well) and fewer opportunities for RF to get into the PC and cause glitches.

Plans going forward

I plan to replace the operating desk to be more contest friendly. It has to be longer to accommodate two operator positions (multi-op contesting), no drawers to bang knees into and reduce operator reach and have multiple levels to keep ancillary equipment within easy reach. As automation is deployed there will be less need for ancillary equipment, such as manual antenna switches, or the functions will be moved to software (PC control of rotators, antenna choice, etc.).

Because the keyboards make it more difficult to control buttons and dials a popular solution is to raise the rigs on a low shelf. There is less risk of accidental key presses when reaching for the rig. In some designs the keyboard can slip underneath the rig when not in use. Desk clutter is reduced when the station isn't being use.

Another shelf above the rig can support manually tuned amplifiers to keep them in easy reach to tune them after band changes, and for frequency and antenna changes within the same band.

Since the layout for two keyboard SO2R is similar to that for two operator multi-ops there is less work to do before and after the contest. Rotate a few boxes, roll up another chair and you're pretty well ready. The need for a second PC and display(s) will initially increase the complexity of transitions until the process becomes routine. The greater the degree of automation the fewer the items that must be rearranged.

Over the winter my shack plans will be refined. I'm not sure how much I'll actually do this winter except that I do want to be multi-op ready so that I can invite my friends over for contests. An effective SO2R station is a step along that path.

I consider myself an SO2R novice and I will keep practicing in contests and evaluating alternative station configurations.

Tuesday, November 5, 2019

QRP for the FTdx5000

After selling my Elecraft KX3 earlier this year (as planned) I was left with one rig that could be dialled down to 5 watts for entering contests in the QRP category. That rig is a Yaesu FT950, a rig with very dated technology. It used to me my main transceiver for most operating. Although I still enjoyed using the KX3 its use was solely for QRP contest entry after returning to using higher power.

Because its receiver is quite poor I avoid the FT950 other than as a second radio for SO2R contest operation. Until I upgrade shack equipment to be more contest friendly I use it to practice SO2R. Eventually it'll be replaced.

My main rig is an FTdx5000. This 200 watt transceiver cannot be reduced to QRP power level. Its minimum setting is 10 watts. The problem was that I intended to enter the ARRL CW Sweepstakes contest in the QRP category this past weekend. I couldn't bear the thought of using the FT950 all weekend.

I also wanted to improve my modest SO2R skills. This contest is great for that since the pace is more measured and with QRP I don't have high hourly rates beyond the first few hours. I also wanted to improve on last year's score when I might have won had I operated full 24 hours.

My objectives meant borrowing a transceiver or fitting the FTdx5000 into a QRP box. I opted for the latter. Aside from what ought to be the obvious solution that I eventually selected a few other paths were investigated:
  • Class A: Running the transmitter in low distortion and low efficiency class A reduces the maximum power to 75 watts. It turns out that adjusting the power does not proportionately decrease the power by ⅝ at all level. If you set the power to 10 watts you still get 10 watts, but a supposedly very clean 10 watts.
  • External ALC: There is a negative feedback port on the rear panel to allow an external amplifier to dynamically reduce the power level when it is over-driven. I tried it with a AAA battery in reverse polarity -- the port accepts from 0 to -4 volts. Nothing happened. An internet search didn't solve the puzzle. E-ALC was ruled out since time was running out.
  • Lossy coax: Unfortunately I had none suitable that I could connect. In any case the loss would be frequency sensitive.
Not surprisingly I went for the brute force solution: an RF attenuator. It's a simple project that took me only two hours to whip up in the workshop. It has just a few design parameters:
  • Knock 10 watts down to 5 watts from 1.8 to 30 MHz.
  • Dissipate 5 watts of heat, preferably with 100% duty cycle for ultimate robustness.
  • Good impedance match to 50 Ω.
The circuit diagram for 3 db attenuators with 50 Ω ports is easy to find. Calculation is more difficult. From an old ARRL Handbook the series resistance is 18 Ω and the parallel resistance on each port is 300 Ω. These are exact or close to standard resistor values so I went digging in my junk box for suitable candidates. Then it was off to my workshop.


Before visiting the junk box I did some calculation to determine that most of the power dissipation is in the parallel 18 Ω resistance. This isn't surprising since it is by far the lowest resistance in the network, ports included. I didn't bother figuring out the exact dissipation values since close is good enough for this application and solving resistor networks isn't fun.

Construction is incredibly simple. The biggest job was punching the ⅝" holes for the SO239 panel jacks. I used the cheapest jacks I had on hand. The box is new from my stock of plastic and aluminum boxes that I keep on hand for home brew projects.

Although simple there are a few points worth mentioning:
  • The box should be conductive to prevent RF leakage in and out and to minimize frequency sensitive impedance variation.
  • The wire between the jack shells further improves high frequency performance. It's better than solely relying on the enclosure. Notice the short leads of the parallel resistors the wire makes possible.
  • Carbon composition is the best choice with carbon film close behind. For HF use other resistor types can be used but never use wire-wound resistors.
  • Resistance values can be achieved with multiple resistors in series or parallel. With the help of an ohmmeter you can get very close to the exact values. Resistors often deviate from the specified value (pay attention the tolerance colour band) so try them all. Multiple small size resistors can have the power dissipation rating of a single high power resistor which is less likely to be found in the junk box.
After soldering it together I plugged my antenna analyzer into one port and a 50 Ω load into the other and swept the HF spectrum. It's very flat with a maximum SWR below 1.1 up to 30 MHz. I didn't test it at 6 meters and above.

The final test was to connect it to the rig and place watt meters at each port. Since I have only one standalone power meter I relied on the rig's PO meter for the transmitter port. Power was reduced to 10 watts and tested at a few frequencies.


The result was very good. Since power meters are often inaccurate I compared the meter reading with what I recall from using my KX3 at 5 watts. Both readings are a whisker above the 5 watt tick. The difference expressed in decibels would be exceptionally small. In any case the true output of any transmitter is never as precise as suggested by the digital display.

As a further test I opened the box and ran the transmitter with a solid 10 watt carrier for a few minutes. There was no smoke coming from the resistors nor was there obvious heat radiating from them. The series resistor pair was a little warm.

There are a few items to keep in mind when operating with an attenuator of this type:
  • If your rig has a physical power level control it is easy to forget the attenuator is there after you're done with a QRP event. Transmit at 200 watts and you'll have to replace all the ruined resistors. Look for the software parameter to limit the maximum power to the lowest setting. On the FTdx5000 that is 20 watts. The attenuator will survive dissipating 10 watts.
  • Receive strength is reduced by 3 db. On HF you may not notice, more so during the present solar minimum when you are not often on 10 or 15 meters. If it's a problem increase the rig's pre-amp setting. Modern receivers have an abundance of pre-amplification features.
  • You don't need a tuner! The increased return loss due to the attenuator greatly lowers the mismatch seen by the rig. For example, my poorly adjusted 80 meter inverted vee has an SWR of close to 3 at 3500 kHz and requires the ATU. With the attenuator the SWR was not much worse than 1.2 so the ATU was switched off throughout the contest. 
  • Despite the low SWR seen by the transmitter the SWR at the antenna port is unchanged. Large deviations from 50 + j0 Ω will change the attenuation level to a value lower or higher than 3 db. For high SWR you should use a tuner between the antenna and attenuator to be certain that you are below the QRP power limit.
The attenuator worked perfectly during Sweepstakes. I was going to discard it afterwards (recycle the components) then reconsidered since there are other contests in which I'd like to have the option of operating QRP. One possibility is the Stew Perry TBDC on 160 meters this winter. I'll keep it around.

Thursday, October 31, 2019

Hy-Gain Trap Repair

Traps on Hy-Gain HF yagis are not really designed to be serviced by users. Of course we're hams so we do it anyway. Despite a lot of disparagement of traps including those of Hy-Gain yagis they can be effective performers. With the wide availability of inexpensive Hy-Gain yagis on the used market many hams will find themselves with a good tri-band yagi that has been in the air some time and may need some repair. The traps are usually the only daunting aspect of the job.

I purchased my TH6 and Ham-M rotator from a local ham back in 1985. At that time it had been on his tower for at least 10 years. In those early days the hardware wasn't stainless steel so much of that had to be cut off and replaced. The dreadful BN86 balun that comes with the antenna was soon discarded in favour of a coax choke. A couple of the traps needed service and I puzzled out their disassembly and repair -- I couldn't benefit from an internet search back then.

When done it performed flawlessly until 1992 when I dismantled the tower and antennas and exited amateur radio for over 20 years. I kept the antenna, and indeed I sold very little of my equipment in the intervening years. I restarted in the hobby in 2013 in a small way, gradually increasing the size of the antenna systems. The driven element was put to use as a trap dipole for a short time.

In 2017 the antenna was refurbished and raised to the top of my new 150' tower. A couple of mechanically suspect traps were given cursory attention since it was the onset of winter and time was of the essence. Trouble reared its head the next winter. I had planned to have it up there for no more than 6 or 8 months but changed plans meant leaving it up there another year. Hope is a poor strategy for ensuring antenna reliability.

Again I failed to repair the suspect traps when I had it on the ground this fall. It went intermittent during CQ WW SSB this past weekend. This time I would have to take action. It was a simple matter to isolate the problem. With an antenna analyzer attached I wiggled the elements within reach of the tower. The SWR bounced around when one half of the driven element was shaken. The trap itself wiggled which made the failure point obvious. It was a simple matter to pull the half element out and lower it to the ground.

Trap structure

Hy-Gain yagi traps are not designed to be opened and serviced. Of course countless hams, myself included, do it all the time. The first time a trap is opened it is difficult to separate the parts without causing damage if you are unfamiliar with how they're built. A mistake usually makes it unusable. It is worthwhile to learn how to do it properly if you insist on doing repairs yourself.

The first thing to know is what's inside: the components and how they're put together. All the Hy-Gain traps for the tri-band yagis are the same no matter the model, be it an ancient TH6, a relatively recent TH11, a TH3, an Explorer 14 and so on. Indeed there are only 4 traps for the tri-band yagis:
  • 10 meters: there is a different version for parasitic elements on some yagis
  • 15 meters, for directors and reflectors
  • 15 meters, for the driven element
They are mostly distinguishable without the part numbers printed on the outer body, which is a good thing since the labels fade with age. The 10 meter traps are shorter than the 15 meter traps, the 10 meter and 15 meter parasitic element trap coils are wound with aluminum wire, and the 15 meter driven element trap coils are wound with copper wire.

Compare body lengths and peek in the weep holes and you have all the data you need to identify the trap. That said, I haven't directly compared the two versions of the 10 meter trap. Hy-Gain sells new traps at a reasonable price, and even most of the component parts. That's an alternative to repair. Go to their web site and search for "trap".


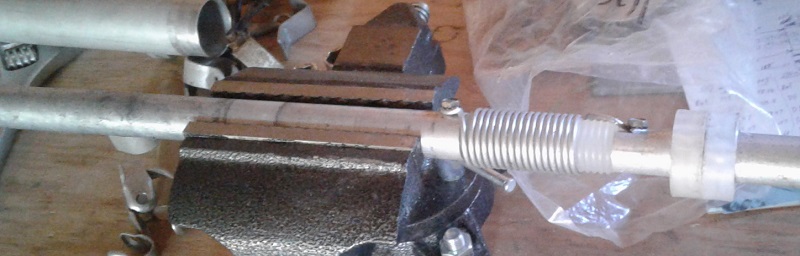
I pulled a broken 10 meter trap from my antenna junk box that I scavenged from another ham's antenna nightmare. The coil form and tab connecting the shell (capacitor) to the right tube are broken. I don't know the story of how it broke. Laying out the pieces as I've done gives an idea of what's inside. These traps are really very simple devices and quite robust when not abused in service, disassembly or reassembly.

The three sheet metal screw that secure the coil end and the shell tab are frequently criticized. While not a superb choice the screws are tough and have an integrated lock washer, and when the traps are properly assembled the screws are under very little stress. I judge the design a reasonable compromise between cost and robustness. The trouble comes when the traps are reassembled after service.

The plastic spacers are critical to the strength of the trap. Install them incorrectly and fatigue failures will occur. Their purpose is to keep the inner tube and coil rigid with respect to the outer tube. Since the weakest component is the coil (wire and form) these must not flex under wind and ice loads. When the spacers are properly positioned flex is minimized. It takes two spacers on either side of the coil to prevent the inner tube from flexing.

The inner end of the 10 meter traps (on the right, with the tab) flex the most since the spacers are close together. Over the years the tab can fatigue and break. This is usually only a problem on the driven element since the larger and heavier 15 meter trap on the outer end of the element increases stress on the 10 meter trap.

The spacers are positioned correctly when manufactured. Dimples (small depressions) in the shell hold the spacers in place. There are cavities in the spacers that align with the weep holes so that the spacers don't dam water flow.

To disassemble the trap remove the screw on the shell tab and push the inner tube left with respect to shell as oriented in the picture above. Some force may be needed to push the two left spacers over the dimples. Unfortunately the spacers may suffer some damage but there's no good alternative to getting them out. The spacers on the right will most likely stay where they are during disassembly and reassembly.

To reassemble the trap you push the inner assembly in from the left of the shell. If the rightmost spacers moved reposition them first. The one on the outside comes close to the tab. The other should be pushed from the left to its approximate position. Use the dimples as a guide but don't obsess over getting it perfectly aligned. But do try to have a weep hole aligned with the outer tube weep holes.

Even it isn't in far enough the trap coil screw push it further when it is inserted. Avoid this if possible since is a small risk of damage to the spacer and coil. If the spacer is too far outboard use a blunt metal rod to lightly tap it toward the coil through the outermost spacers weep holes, going around from hole to hole so that it doesn't jam. The most common reason for the spacer to be too far outboard is pushing the inner assembly too far to the right. Move slowly and watch for the tab screw hole to appear. Screw the tab to the inner tube.


Push a spacer in from the left until it is at or near its dimple on the left side of the coil. Hold the outer tube in a non-marring vice while for best control and least risk of damage to the tab. A 1" PVC pipe can be used to slide over the inner tube and apply even pressure to the spacer. Don't push it in too fare (right up against the coil) or you'll have start over again.

Finally insert the leftmost spacer and you're done. Hold each end of the inner assembly check for flex. There should be little to none. Remember to slip on the trap covers. I wrap the covers with Scotch 33+ for extended UV protection. Replacements are cheap if you need them.

Repair

For my repair job I disassembled the 10 meter and 15 meter traps. Although only the 10 meter trap was flexing I chose to do both since I had them in hand.

No wire breaks or loose hardware were evident. This can be a problem when the traps are mechanically unstable because the coil wires or forms will flex and eventually break. There was no damage of this kind just some debris and corrosion. An old insect nest was removed.

I undid the screws at either end of the coils and lightly sanded the aluminum surfaces to ensure good electrical contact. The inner end of the 10 meter trap tube was slightly distorted by the flexing so I pulled it from the coil form and gently applied pressure to the tube with a vice to reduce the freedom of motion it had developed. Perhaps a needless repair but I prefer that the form fit snugly.

As expected the spacers were out of position and that is what caused the flexing. The spacers were correctly positioned (as described above) during reassembly. The half element was then put back together and the dimensions checked. The entire job took less than 2 hours despite proceeding carefully. I wish that I'd taken the same care the last time I did this job!

Back in the air

For late October the weather was warm so I rushed to put the driven element back together before the weather turned. The high wind that day didn't dissuade me since the half element is easy to lift. I stuffed it and the insulator back into the boom clamp and attached the clamp and wires going to the balun and hairpin (beta match shorted transmission line stub). Within minutes I was ready to test my repair.

The element no longer wobbled when shaken. I connected the antenna analyzer to the balun and the SWR was what it ought to be. So far so good. To my dismay the SWR again misbehaved when I wiggled the driven element in exactly the same fashion as before the repair. That was not good. Although the poorly assembled trap need fixing the problem was evidently elsewhere.

Oops!

Further troubleshooting showed there were two problems not one. The first was found by wiggling every wire and connection on the balun, driven element and hairpin stub. The wire from the stub to the clamp on the suspect half element was intermittent.

It seems that after 45 or 50 years the stranded wire had few intact strands remaining. Nothing lasts forever. I now realize that this was the same intermittent problem that developed earlier when the antenna was on top of the 150' tower.

Hy-Gain yagis of that vintage did not use stainless hardware. The screws and nuts are pretty well welded onto the aluminum tubes of the stubs. Since I was not prepared to tram the antenna to the ground to destructively remove the hardware I used a hose clamp to attach the new wire to the tube.

The wire quality is not the best but it should hold through the winter. I put a few layers of tape on the wire insulation where it might touch the boom clamp for added protection from high voltage and stray capacitance.

Finally the antenna survived the wiggle test. The SWR tests perfectly on all three bands.

The next problem was further down the tower. Where the short length of RG213 from the antenna to connects to the long length of Heliax the UHF to N adaptor was visibly bent underneath the layer of weatherproofing. Although the SWR was fine in the shack this could not be left as is due to risk of imminent failure.

The Heliax terminated with a male N and the RG213 had a male UHF. Adaptors with an N female on one end and a UHF female on the other end are rare. The 10 meter length of RG213 I grabbed from my junk box had a heavily taped N female on it that looked perfect for what I needed to hook up the newly side mounted TH6.

When I cut away the layers of plastic and rubber I discovered the problem. This old bit of coax was older than I realized. Inside was an adapter I home brewed back in the 80s for LDF4 runs, all with N male terminations.

Oh, to be young and foolish again! Unwrapping this contraption brought back memories. The shells of the N female and PL259 reducer were merely pressed together. It had no mechanical strength at all. I'm surprised it lasted as long as it did. Only the tape holding the halves together allowed for electrical continuity.

The abomination was replaced with an N female barrel connector and a more common N male to UHF female adapter. I have both in abundance since I routinely connect Heliax main runs to RG213 and LMR400 terminations. I taped up the joints and this time I really did had the problem resolved.

Rush jobs coming up

The weather is finally turning colder, windier and wetter. Time to finish the many antenna jobs I have ongoing is running out. Just this week I found time to (finally!) complete my 80 meter vertical yagi. An article on that should be out next week. The 20 meter and 15 meter stacks are slowly progressing, with two yagis tested and working. I am rebuilding the boom of the upper 20 meter yagi so that it is stronger and lighter. Permanent gamma matches to replace the testing/tuning gamma matches are under construction. Other hardware to side mount and mast mount the yagis has recently arrived or will be fabricated shortly.

The time taken to repair the TH6 delays every other job making this problem very unwelcome. The antenna was really proving its worth during CQ WW SSB before it quit working. As the number of towers and antennas grows the probability of a problem arising increases. Problems come in all types. For example, this week I discovered a small pit dug into the bundle of Heliax and other cables running from the 150' tower. Some animal, probably a skunk, dug up a wasp nest that was down there. I inspected the cables -- thankfully there was no damage -- and refilled the hole.

Maintenance is never ending in a growing antenna farm. I am spending some time on the air, entering contests and working DXpeditions. I count myself fortunate to have the time to do all of this and for the friends willing to help even when the weather is unpleasant. They seem to enjoy being a part of this journey.

However it is better to do things right the first time and avoid unwanted repair jobs.

Friday, October 25, 2019

Tower Lift Failures - Are You Prepared?

First the good news. My new 140' tower is complete. At the time the adjacent photo was taken the only thing left to do was to tighten the top set of guys and realign the tower. There are no antennas on the tower at this point. A few of the yagis for the 15 and 20 meter stacks can be seen on the ground biding their time.

The reason I delayed completing the tower was to build the mast and rotation system which required keeping the top two sections on the ground. With that job completed the tower sections could be raised. More on that in a subsequent article.

Unfortunately the final lift was not without mishap. No matter how carefully you plan and execute an operation of this scale there is an ever-present possibility that something will go wrong. It is never routine.

Several of the hams who have generously given their time to this project have commented that I make these big jobs look easy. Of course they are not easy. It helps to have experience but that is no insurance policy. What experience does provide is a bag of tricks to avoid or recover from many of the things that can and do go wrong.

No one was injured and the toll on tools and equipment was minor. I enforce safety practices on site. By describing what happened and what may have precipitated the mishap I hope to instill a sense of respect in readers for towers big and small. Mistakes can be very costly.

Photo credit: all but two of the pictures in this article are courtesy of Alan VE3KAE who was assisting me that day.

Lift procedure

Like most hams I don't do tower lifts the way professionals do it. The cost of tools, equipment and manpower is too high and unjustified for a ham. For those without the ability to do the work it is worthwhile to hire those professionals. I won't say more about how they do these jobs.

Hauling 150 lb loads 150' vertically upward is not a job for a few muscular hams. A manual winch with a 4:1 or greater advantage isn't as easy as you might guess, and it takes a long time. Power is required. A vehicle or tractor comes in handy and I've used both over the years.

A pulley at the tower based turns the downward rope from the gin pole horizontal. Find a suitable attachment point (tow hook, trailer hitch, etc.), hook up securely and without risk to the vehicle and away you go. The biggest problem is that you have more power than needed. An automatic transmission with a hydraulic clutch helps modulate the power. A rope rather than steel cable provides elasticity that allows a safe and graceful recovery when the load inevitable snags a guy or other tower protrusion.

Failure

When the tower section was up about 90' the rope seized. The load would not move up or down. A brief inspection discovered that wheel on the bottom pulley had split in two. The rope was caught in between the broken halves and was partially severed.

No disaster at that point but not an easy problem to resolve. The axle kept the rope from popping out and dropping the load. Had it broken through the load would have dropped at least 40' and possibly hit a guy at the 65' level. Damage to the car was likely. Had the rope been severed the load would have gone into free fall, an even worse outcome.

Since the situation was stable I had a few minutes to consider the problem. We took care to stand to one side of the tower while doing this. Had the rope or axle broken we would have had time to jump away from ground zero. Hard hats and steel toe boots are no match for a free falling load.

Unfortunately there is no picture of the seized and broken pulley since we were fully occupied dealing with it. The picture shows the split wheel and axle after being extracted from the pulley during the recovery procedure.

Recovery

As the saying goes: necessity is the mother of invention. The come-along (hand winch) and a bunch of old guy grips were at hand in preparation to pull in the top set of guys. While a poor fit the grip was wrapped on the top side of the rope, a thimble inserted and the the come-along hooked to the tower bottom.

Once the tension was transferred the load was safely suspended. The pulley was then broken apart and the rope freed.

A new and larger pulley was attached next to the old one on the same cable wrapped around the tower base. The rope was wrapped around the pulley wheel and the pulley was reassembled. Only then did we pause to have a close look at the rope cut.

No more than 25% of the rope fibres were severed. It still had ample capacity to support the load. The car was backed up to take up the tension and test this assessment. Had it broken through the come-along would have held the rope.

The rope was again inspected under load. We decided to continue the lift with the damaged rope and new pulley.

Completion

The lift was completed without incident. Before climbing up the come-along was reattached to the rope. This eliminated further risk from the damaged rope. My helper used the come-along to lower the tower section into place when I was in position.

The two pictures were taken at almost the same moment. Alan took the one on the left -- one of the rare pictures of me in this blog. You can see me retrieving or replacing my phone for the picture on the right.


Notice that the gin pole has taken some abuse during this problem plagued lift. It looks bad but all that happened is that the pole rotated and pivoted on the top pin so that it is no longer perfectly vertical. This has happened before and is not a risk. All that said it is safer for the rigger to be at the top before the lift, staying above the load rather than climbing below it. On that day the ideal wasn't attainable.

After clearing the tower top the load typically dangles on the far side of the gin pole, only occasionally drifting in the breeze to where you see it in the pictures. The tower has only one climbing face so I cannot climb another face as the load drifts. We monitor it in case something untoward occurs.

A few minutes after reaching the top the section was lowered and bolted in. The guys were then lifted and attached to the segments on the top section. Success at last. After a break we pulled the guys to the anchors and called it a day.

Aftermath

Equipment doesn't come with a best before date. Everything should be inspected before an operation. Had I looked closely at the pulley it's possible I'd have seen something. Often the damage isn't visible so you must rely on the quality of the hardware.

The pulleys have seen lengthy service: lifting 300' of tower; tramming yagis; and a variety of other heavy lifts. Each has passed many thousands of feet (or meters) of rope and cable. No equipment lasts forever, not even when the working load capacity is never exceeded. Since an identical pulley is on the gin pole I brought it down and inspected it. Unlike the broken one there is no evidence of stress. Despite that the pulley will no longer be used at critical locations for heavy loads.

The 100 meter long polypropylene twist rope is approaching end of life, and that's okay since I planned to discard it once the tower was up. There is UV damage (polypropylene is very sensitive to UV) and fraying. Considering what I paid for it I have no complaint. I'll can buy another reel of it or a better product.

I subsequently spoke to a local tower pro. He showed me the rope and pulleys they use. These are very expensive and look awesome. I found it interesting that they never use steel cable, only rope. I will hunt for suitable products at a better price point.

For critical lifts I will be more diligent about using keepers. These are loosely bound ropes or cables that "catch" lifting ropes should the hardware fail. For example, a keeper for the recent failure would be a cable around the tower pillar that passes on the outside of the pulley. Even if the rope comes completely free the load will not fall. Unfortunately the mechanism to recover from a severed rope is not so easy to implement. The answer to that is to use better rope.

As to why the pulley wheel failed I have a likely failure mode. These pulleys are made for rope. As the loaded rope passes over the wheel it compresses and spreads the load over a large cross section of the wheel surface. Steel doesn't behave this way. Since it is thinner (for the same capacity) the force is focused on a narrower area of the wheel.

Second, aircraft cables are hardened steel that abrade the wheel surface, thinning it and reducing its load capacity. Steel cable should not be used on rope pulleys or the pulleys should be discarded sooner and inspected before each use. In future I will try to avoid steel cable for lifts and tram lines. The former I haven't done for a long time anyway.

None of us is perfect. By dissecting this mishap I hope to provide a lesson to myself and to others. Learning by direct experience alone can be deadly. Be safe out there.

Monday, October 14, 2019

Low Band DXing: You Snooze, You Lose

Those who have been reading this blog lately will know that I've been very busy lately with tower and antenna work. That time mostly comes from that devoted to operating so that the rest of my life isn't impacted too much. However there are many DXpeditions this month that do entice me to make an occasional effort.

One of those DXpeditions was ZK3A Tokelau. Although I have ZK3 worked and confirmed I wanted to log it on the low bands where it is a new DXCC entity for me. After working ZK3A on CW and SSB on 40 and 80 meters there was just 160 meters left to be worked.

I did try one time early in the DXpedition when I was awake during a sunrise enhancement. They were very strong for perhaps 10 to 15 minutes. Despite having a good antenna and running a kilowatt I was not successful. Indeed few in this part of North America had success that morning since East Asia, especially Japan, had the better signals.

As the sun climbed above the horizon they faded into the noise. Not being a morning person I tried only once or twice more. Each time they were not on 160 meters. I didn't fret since I was happily busy with other things and the DXpedition was scheduled to last until October 11.

On the 8th a friend called and told me how he'd worked them early that morning on 160. Rather than wait for sunrise he got up a little past 4 AM (0800Z), a time when it was daylight in Asia and most North Americans are asleep. The sun rises 30 minutes later in JA and the competition rapidly escalates. He planned it well and deserved the contact.

Our conversation motivated me to give it a try. A little after 4 AM the next night I got up and wandered in the shack. I turned on the rig and tuned around. About the only DX was a very weak T30GC making a few contacts with the west coast. There was no sign of ZK3A. In fact they were not spotted on any band.

Before giving up I checked one of the European DX news sites where the first item was that the DXpedition ended early. The boat arrived early for an unrelated medical evacuation so they tore the station down and jumped on board. I had missed my chance for good.

My friend commiserated with my bad luck by suggesting I'd have more opportunities in the future. But for him at his more advanced age, he explained, he might not have another shot at ZK3 on top band so he had to make the effort. It worked for him.

As the cliche goes: you snooze, you lose. Being a DXer isn't always comfortable not even when you have big antennas and power. The DX calls the shots, not you, and you must be flexible if you want to work them. I knew that yet I passed on the opportunity each night in favour of a good night's rest. Until next time.

Thursday, October 10, 2019

Aluminum Yagi Construction: Materials and Methods

Be warned: after reading this article you'll probably abandon your home brew HF yagi project and buy a commercial product instead. I am not that sensible. I'll keep building them despite the difficult experience.

With that disclaimer out of way let's dive in. You will learn how I went about the physical construction of 5-element stacked yagis for 15 and 20 meters. The yagis are complete but not tuned. That's my next task. Then I have to raise them and put them to work. I am nowhere near done.

Perils of aluminum shopping

I envy Americans, at least when it comes to aluminum tubing. Despite Canada being among the biggest global producers of aluminum finding what a ham needs is challenging. On the positive side, aluminum tubes, pipes and other shapes are readily available and economical.

Nesting tubes for telescoping tapered elements requires close tolerance of inner and outer diameters. Milling and finishes affect the usability of tubes since the measured and published dimensions may not match or be consistent. The English dimensions used in the United States for tubes and pipes are most common in Canada due to the close trade relationship and despite this being a metric country. When it comes to yagis this fact is helpful. I have heard that telescoping available metric tube sizes can be difficult.

The 0.058" and 0.120" wall diameter high tensile alloy tubes in stepped ⅛" sizes work best for yagis. The former is unavailable here and the latter is uncommon. These tubes are classed as aerospace tubing and though widely available in the US must usually be imported from there. That can be costly since shipping can double the price. Shipping of longer tubes is especially expensive

To keep cost as low as possible I chose a taper schedule after discussions with local suppliers and after considering the tooling requirements to adapt tubes that were close to being suitable for telescoping. All my tubes are 6061-T6 alloy except for the 6063-T832 aerospace tubes I imported from the US. I did my own importing since in every case it was far cheaper than getting it via a local metal supplier.

I received an unwelcome lesson in the difference between mill and other aluminum finishes. More on that later. First I'll describe my taper schedule and construction techniques.

Element taper schedule

The longest half elements are the 20 meter reflector at 219.5" and 15 meter reflector at 143.4". Here are the half-element taper schedules. The centre 1" tube is twice the half-element length.
  • 1" OD, 0.120" wall: 60" (20m); 30" (15m)
  • ¾" OD, 0.125" wall: 60" (20m); 40" (15m)
  • ⅝" OD, 0.058" wall: 36" (20m); 24" (15m)
  • ½" OD, 0.065" wall: variable length element tips
All the local tubes were purchased in 20' lengths and cut to 10' lengths for transport in my vehicle. That explains the lengths of the 1" and ¾" tubes. The imported ⅝" tubes were purchased in 6' lengths to optimize shipping and cutting prices. Aerospace tubing comes in 12' lengths.

The approximately ⅛" wall for the inner segments increases the wind and ice survival. For those in the US, it may be more convenient to nest 0.058" tubes in adjacent ⅛" diameters. Ultimate survival was not calculated but interpolated from published designs. These yagis should survive this 135 kph wind zone with capacity to spare, even with modest icing.

The ¾" tube fits snugly in the 0.120" wall 1" tube with no friction at all. I consider this a lucky break since I expected 0.125" to be available yet the 0.120" was available and inexpensive. Since I bought so much they gave me a substantial discount.

The ¾" tubes were machined to fit a ⅝" tube at the outer end so it didn't really matter whether the wall was 0.120" or 0.125". More on that machining below. Fitting the ½" tips into the ⅝" tube with its 0.509" ID should have been easy but wasn't, as I discovered to my dismay.

In tandem with this major project I have also developed a taper schedule for 40 meter yagi elements that utilizes the same taper schedule for the outer halves of the elements. The inner halves will be substantially heftier. I'll leave this construction project for a future article until I've built one of these monsters.

Stepped diameter correction (SDC)

My EZNEC models for the yagis were updated with the final taper schedule for the elements. Using the built in SDC add-on for the NEC2 engine I adjusted the tip lengths to return the yagis to their original designed frequency ranges. This process retains the performance of the designs. For the lucky few with NEC4 although the SDC algorithm is superfluous it is still necessary to adjust the element lengths for the taper schedule.

You must scale the yagi elements since without the SDC for the final taper schedule the performance changes can be substantial. This was most evident when I scaled the 20 meter yagi. Surprisingly the 15 meter yagi, despite having the same taper schedule, required almost no change to the element lengths.

I found it helpful to scale the element in steps, starting with the inner tube section and working outward, checking yagi performance after each step. The changes at each step are not always in the same direction so that a later section change cancels the previous deviation. This is what happened when I scaled the 15 meter elements.

Drilling out thick wall tubes and pipes

The inner diameter of the ¾" tubes is ½". Although the thick wall means I didn't have to nest a ⅝" tube full length inside the outer end must be widened to fit a ⅝" tube. Alternatively a coupler could be used -- " on the outside or " on the inside -- both are troublesome due to needing to import ⅞" tube (0.058" wall) or finding thick wall or solid ½" inserts, respectively.

Reaming out the ¾" tubes to ⅝" must be done precisely. Ideally it is done on a metal lathe in a machine shop. They will do it but it can be costly since I have 40 half-elements to be machined in this manner. So I chose to do it myself.

My first attempt (left) did not go well. I simply put a ⅝" bit in my hand drill, lined it up by eye and had at it. The bit suffered a lot of chatter and even with frequent progress inspections the bit went off centre over the 3" depth of the cut. For my second attempt I first used a 9/16" bit then used the ⅝" bit. The tube wall is thicker, close to the ideal 1/16" since there was less chatter. Doing the cut in two stages help keep the hole almost perfectly centred.

I decided to keep going and do all 40 of them. It took some time. Each tube required at least 10 minutes of work. There were several that drifted off centre and had to be cut off and redone. The 2" to 3" shortening of these tubes has a negligible impact on the SDC. I learned a lot about drill rotation speeds for cutting aluminum and the dos and don'ts of lubricating aluminum. After an initial trial I discarded the lubrication and did the drilling dry, which went faster and with fewer mishaps.

Chuck driven reamers might have done a cleaner job but for the amount of material to be removed. It would have had to be done in more steps and at greater expense since I did not (yet) have any reamers.

I'd hate to do this job again but it did work out pretty well. That is, except for one difficulty which I did not entirely appreciate beforehand.

In the picture you can see the drilling jig and the two drill bits. The technique of screwing together two wood blocks to secure round tubes without crushing or marking them is one I learned a long time ago when I built a bicycle frame from very thin wall chrome-molybdenum steel tubes.

With a standard ¾" bit (not a wood bit) you make a hole as shown. Use a drill press to make it perfectly vertical. The halves are then unscrewed and a sander applied to one or both interior faces to reduce the diameter a tiny amount. Put the halves back together and lightly hold in a vise. Insert the tube and tighten the vise. The tube won't turn except under very high torque.

Pounding a round peg into a round hole

The problem in a nutshell: you can't fit a ⅝" tube into a ⅝" hole. Well you can, but just once since it won't come out after you've pounded it in. This is an example of a press fit and it is totally unsuitable for building yagis.

Even 0.001" makes a difference. My local machinist took one of my ¾" tubes and hand reamed the ⅝" opening to 0.626". The tube now fit though with some friction. After hearing his quote to do all 40 on the lathe I decided to order a reamer online and do it myself. I chose 0.627" to ensure the tubes could be pulled apart in the future.

I use the same ¾" jig to hold the tube. Since I don't have a handheld drill with a suitably large chuck I reamed the tubes manually. I used vice grips and protected the tool with a metal wrap. Unlike a fluted drill bit the reamer is very unlikely to wander off centre. Shaving 0.001" all around is doable by hand without only a little effort.

When the reaming was done the ⅝" tube slipped in easily and hand no discernible slop. Then I did the remaining 39. All this work did save on importing aerospace size tubing, however I might have chose otherwise if I'd thought through the troubles of reaming tubes.

The woes of mill finish

My reaming woes were not over! An unexpected and larger challenge lay ahead. The 200' (60 meters) of ½" tubes I purchases for element tips came with a mill finish just like all the other tubes locally sources. They did not fit into the ⅝" tubes. I was surprised since the 0.058" wall leaves an ID of 0.509", which should leave plenty of room.

Mill versus mirror finish
With a sample in hand I made another trip to the machinist. He put his precision calipers on it and found the diameter to be 0.508". However the diameter is not consistent. That's what you get with a mill finish.

He explained that this oversize diameter is quite common on small aluminum stock. Worse is that for a press fit of similar aluminum alloys a thin layer of material is pushed along the surfaces and can lock the tubes together. That is, once you press it in it won't come out again. I had already discovered this the hard way.

The aerospace tubing, the machinist explained, goes through a grinder that produces surfaces with precise tolerances and a mirror finish that the market demands. The consistent 0.009" gap allows easy nesting to any depth. But I had 200' of tubes I didn't want to waste so I took the reaming challenge.

This was a bigger problem that reaming the ¾" tubes since tips must be adjustable and that requires greater depth of insertion. I first ordered a 0.511" reamer reasoning that an additional 0.002" should be plenty. It wasn't. It was better than a press fit but not enough to allow the tubes to slip together without any binding.

My next step up was a 33/64" drill bit with a shank that would fit the chuck of my handheld drill. Reaming 0.509" to 0.5156" is difficult to do by hand so I chose to do it with power. I did experience binding of the bit inside the ⅝" tube when I rushed the job so I took it in easy steps, being sure to regularly allow the flutes to clear. It wasn't fun but finally it was done and the ½" tubes slipped in to 5" depth. In a pinch the tube can penetrate 7" since I went deeper with the 0.511" reamer.

To add insult to injury, after all the foregoing woe I ordered more of the ½" tubes for other yagi projects. It looked different: the finish was shinier and there was source and material lettering on the tubes, unusual with mill finish. After putting calipers on a sample and comparing with the previous order I grabbed a ⅝" tube and lined up the two. The new ½" tube slipped right through the ⅝" tube just as it should. I'm tempted to run back and pick up more in case they switch suppliers again. No reaming needed for this batch.

Joining tube sections

Apart from the element tips all tube joints are screwed together. This forms a reliable bond and because these joints are fixed there is no need to make them adjustable. Many commercial and home brew yagis use slotted tubes and hose clamps since they are easier to construct.

Each joint -- 1" to ¾" and ¾" to ⅝" -- uses two #8 stainless screws with a flat washer and nyloc. Two holes are drilled through at right angles, one near the edge and near the back of the 3" overlap.

I borrowed a trick from other yagi builders that achieves a superior mechanical and electrical connection. One side is drilled wide so that the screw head rests on the inner tube. When tightened the opposite sides of the tube are firmly pressed together. This is better than relying on screw torque to distort the outer tube so that it presses against the inner tube. With small screws and high tensile strength tubes it may be impossible to adequately distort the tube.

I made drilling guides out of PVC pipe with the hope of achieving enough consistency that tubes could be interchanged and the holes would be aligned. That didn't work out since that close a tolerance was too much trouble and not really necessary. I soon dispensed with them. However the tubes were clearly marked and stored in groups to avoid mismatches.

Because of the tight tolerances of tube diameters (see above) all holes were carefully deburred, inside and outside. All joints, including the screwed ones, were sanded to remove oxide and coated with an aluminum joint compound (I use Noalox, and there are many others on the market) for a good electrical connection and ease of sliding tubes together and, years in the future, sliding them apart.

As mentioned the tips are adjustable by putting two slots in the ⅝" tube and compressing with a stainless hose clamp. I took some care to cut the two slots straight and opposite to each other with two cuts with a hacksaw. The slots were cleaned with a triangular file and a short bevel placed at the bottom of the slot to reduce stress when compressed The twin slots are wide enough that when the hose clamp is tightened the ½" tips are firmly held.

Element to boom clamps

For 15 and 20 meter elements with 1" × 0.120" centre section the clamps don't have to be excessively large. Following the advice in W6NL's Physical Design of Yagis the plates are ¼ × 4" × 6" 6061-T6511. I cut the plates by hacksaw from a long length of the extruded alloy, thus saving cutting fees and getting a sore arm. High tensile strength aluminum isn't easy to cut.

Galvanized muffler clamps secure the plate to the boom. Each size of boom section, ranging from 2" to 3", has its own clamp size and bolt pattern. The galvanized u-bolts for the elements are the same. I could have used stainless hardware at more expense and order lead time, but it is not necessary. Electrical continuity is via aluminum to aluminum contact not through the hardware. Although there is no texture on the muffler clamps the torque from the element is modest even in a turbulent and strong wind so it shouldn't rotate on the boom.

Using the formulas in W6NL's book I calculated the effective diameter of the plate clamps -- 1.673" -- and inserted that into the EZNEC models. The SDC algorithm takes care of the rest. The boom under the clamp electrically shortens the element a small amount -- estimated ~6% of boom diameter by both W6NL and W2PV -- which is pretty well negligible when considered in combination with the effect of tower, guys, other antennas and hardware "bumps".

Gamma match

Originally I planned to use a beta match and acquired the fibreglass tubes needed to mechanically join split driven elements. Instead I am using gamma matches to reduce the mechanical complexity and to gain the gamma's modest ability to attenuate common mode on the coax shield. Beta and gamma matches are about the same amount of work to tune the impedance match and both require similar shortening of the driven element (capacitive reactance).


The prototype 20 meter gamma match is shown mounted on one of the 20 meter yagis. The gamma rod is ½" tube, making it half the diameter of the centre section of the driven element which is a typical (recommended) ratio.

The fixed spacer is PVC pipe mitered to the top 1" tube and secured with a tie wrap. The tie wrap will be replaced with a more durable clamp when the antenna is tuned. The gamma rod fits snugly through a hole in the pipe. The slider for impedance matching is a strip of 1/16" thick mild aluminum alloy.

There is as yet not coax connector or pigtail to terminate the transmission line. For tuning a variable capacitor will be mounted. After tuning it will be replaced with a hardier capacitor of the same value, either a high-Q, high voltage fixed capacitor or (more likely) a length of RG213 (with covering and braid removed) slid into the gamma rod. The latter method is popular since the gamma rod can be slid to adjust the capacitance. However it is not so convenient for initial coarse tuning.


The ends of the slider were manually wrapped around tubes to create the required shape. The wrap is stopped at approximately 330°, the end bent and the bolt holes drilled. When tightened the grip is very good. A conductive grease is recommended on the interior clamping surfaces.

A difficulty was encountered while forming the gamma rod end. I could put the bend in the right place at the beginning of the process but found it difficult to prevent the long straight section from creeping along the form during the last half of the forming. As a result a couple of the shorting straps are ¼" short. After recalculating the gamma match with the reduced values my concern was assuaged. The gamma capacitance value barely changed and the short position goes outboard no further than another inch.

Booms

The four booms were constructed from a mix of pipe and tube. I tried to find a balance between weight, wind load and cost. Most of my pipe is surplus and inexpensive. When I can't get what I want I either modify the boom design to use what I have or I buy new material as needed. Large tubes and pipes are readily available new and are not too expensive.

The side mount yagis use the largest diameter tubes. Their relatively thin wall makes them unsuitable for rotation at great height. These were built last year and stored until I was ready for them.

The rotatable yagi booms are heavier, narrower and have a modest wind area. They are a mix of surplus pipe and new tubes. The 20 meter rotatable boom is the heaviest with a centre section that is 2-½" schedule 40 pipe (2.875" OD). I made liberal use of my relative strength spreadsheet to contrast and compare alternatives.

Some choices were made based on good fit between various sized tubes and pipes. In one case I had couplers machined but those didn't work out and have been put aside for a future project. I am not bothering to describe details of the booms since my choices are unique to my circumstances.

Waste

Machining, drilling and cutting the elements, booms and clamps produces a lot of aluminum waste. Constant cleaning of the tools and work surfaces was necessary to avoid mishaps.

No matter how well I cleaned up each day aluminum shards appeared everywhere throughout the workshop, on my clothes and hair and in the house. The latter occurred despite cleaning of clothes and boots. The stuff is insidious.

Regrettably there isn't enough metal weight to make recycling worthwhile. However it does occupy a large volume since the shards, especially the strings and spirals spun off drill bit, pack loosely. It'll all be thrown out.

Of greater concern is steel waste since it is darker and therefore more difficult to see. That matters since it is far more likely to cause cuts and slivers than the softer aluminum. Fortunately there is less steel waste, the bulk of it from fabricating the rotation and support system for the mast and yagis.


Putting it all together

Here we have the first of the assembled yagis: the side mount yagis for 15 (left) and 20 meters. The gamma matches are not yet ready. That and initial tuning is coming up. It isn't a trivial task since the feed points are far out on the boom. Access to the feed point is required for every tweak to the gamma match. More on this later.

Element positions were previously marked on the boom. I attached the element clamps then the elements, tightened everything and sighted along the boom to align the elements. To do this properly the boom must be lifted above the ground. That will be enough height to clear the fragile gamma match. I use old cable reels for supports, in this case from 500' spools of EHS guy strand.

Was it worth it?

That's a very good question. For myself the answer is yes despite all the difficulties. It was a superb learning experience and, aside from the time invested, economical in comparison to commercial products. There is also a sense of accomplishment overcoming the challenges of design and fabrication.

Of course the project is not complete. After the tuning the yagis must be raised and fed for stacking. The switching system for choosing lower, upper and both for the 15 meter and 20 meter stacks will be a commercial product. Little money will be saved building my own and it will look and work better. There is no shame in buying some products even for a devout home brewer.

As I finish this article friends are scheduled to come over to assist me with tuning the yagis. Three are built and the fourth (20 meters) is awaiting completion of the boom. I'll have more to say once the next stage is completed. For the present I am relieved to have all this aluminum out of my garage workshop so that I can move around and access things that have been out of reach for weeks.

Monday, October 7, 2019

Cutting Pipe Square

I cut a lot of pipes and tubes building towers and antennas. Most of the time I do rough cuts with a hacksaw or cutoff saw since the angle of the cut is not critical. It may look ugly but once it's up in the air no one will know.

For small diameter thin wall tubes I use a pipe cutter which is quick and makes a square cut. Except that a pipe cutter does not cut cleanly since rather than removing material it pushes it to either side forming a ridge, inside and outside, and the cut itself has a bevel. These must be filed off. The squareness of the cut can be distorted if the file is not kept level.

A hacksaw cuts more cleanly. However to make the cut square it requires a miter stand or the tracing of a reference line when cut free hand. Better is to use a metal band saw. Since my cutting needs are modest I have not invested in a band saw for my workshop. Instead I use a variety of manual cutting methods.

For large diameter pipe, steel or aluminum, the challenge of cutting the pipe square is multiplied. Manual pipe cutters of such a large size are rare and expensive. Even if available they require a lot of muscle. A hacksaw can be used if a square cut can be traced beforehand on the surface.

This is not difficult if the pipe has a known square end to use as a reference. Surplus pipe often does not have even one square face. A different technique is therefore required. I did this recently when I required a square cut on a 3.5" diameter aluminum pipe. I took a few pictures to show how it's done.

Draw a circumference

It's quite easy to scribe a circle around a pipe. You start at point A, travel orthogonal to the axis and come back to point A. But without a guide the line will almost invariably be a ellipse and not a circle. That is, it won't be square and the cut will be at an angle.

We need a straight edge that wraps around the pipe and does not crinkle, warp or that can lie askew. Guides I've tried and rejected include: tape, hose clamps, another bigger pipe, steel and fabric tape measures and drawing a line with a fixed marker while the pipe rotates. They fail because they are not rigid, rigid but not when stressed, a better but less than accurate edge or mechanical instability while drawing.

After considering the problem I found what is perhaps the most unlikely solution and one that covers half the space of my office desk: paper. Although it is easy to crumple and warp it is also easy to have it sit flat when wrapped around the pipe with a bit of tape and care taken to avoid "bubbles". The paper edges are a great straight edge when supported on a rigid surface such as a pipe. Paper is flexible with dimensional rigidity and is superior to straight wraps such as hose clamps because the sheet is wide: if it has a warp it will be immediately visible and can be corrected.

The pipe in the picture is 3.5" OD so an 11" paper edge (standard North American sheet height) almost exactly makes a circumference -- 3.5 × π = 10.9956. In this case the sheet is a little short since it doesn't quite reach around the pipe.

Masking tape on the pipe makes it easy to trace a fine line. The line doesn't have to be perfect provided there are no paper tears. If the pen or pencil wanders just fill in the gap and continue.

Making the cut

Starting the cut is the most crucial step.

Lie the pipe flat on a stand where it can't roll but can be easily turned by hand. I use an ancient Workmate (40 years old!).

With your gloved hand (for protection) precisely guide the blade along the drawn line. Cut with light pressure, taking care to keep the blade from wandering. Correct any deviation immediately.

Rotate the pipe a bit and continue. When you've gone around once you have a shallow cut that will help keep the blade on the line. The tape will tear or be marked if the blade jumps as you cut, warning you to correct the mistake. This is most likely while the cut is shallow.

Continue cutting while rotating the pipe a little every few seconds. As the cut goes deeper you can use two hands on the hacksaw if the stand opening is wide enough that the blade's force doesn't rock the pipe.

As you go deeper take care to align the blade so that it doesn't lean to one side. Many hacksaws, such as the one shown, seat the blade at a small angle for improved work visibility and to counter a natural inclination to lean the hacksaw towards the dominant hand. A straight cut means less filing to remove a bevel and less chance of warping the pipe edge from excessive filing.

Eventually the blade will penetrate the wall of the pipe. Avoid the temptation to speed up and not rotate the pipe. Keep rotating the pipe and the cut will be cleaner.

Finishing

After completing the cut there is some filing to be done. Use a flat file across the full diameter of the pipe rather than filing one wall. This will keep the file flat and maintain the levelness of the surface. Burrs on the outside can be removed with the flat file and a half round file used on the inside.


The finished pipe stands perfectly vertical when on a level surface. When fit to the finished work the squareness of the cut was confirmed.

The use of this cut pipe will be described in a future article after I complete the new 140' tower. It forms part of the rotation system for the top mast. All the mechanical work to the top two sections is being done on the ground before being hoisted up.