When I put up my first guyed tower I used what I called my poor man's transit. I later improved the usability of this technique by mounting the straightest pipe I could find in my bicycle repair stand. When carefully made vertical with a long level it held its alignment quite well. Or it did if the wind wasn't too strong! In this way I roughly aligned my 150' tower and my new tower up to the 120' level (it will be 140' when complete).
Standing (or, better, sitting) back from the pipe and sighting along the length of the tower is not as easy as it sounds. Freezing your body in one position is more difficult than you might guess. Go ahead and try it by keeping a close and a distant object in optical alignment. It's made harder by the distance difference for eyes that need corrective lenses and cannot focus on both objects at the same time.
I knew that the alignment of the towers was less than what it could or should be. One tell was that the towers were not parallel to each other. The error was no more 2" or 3" (5 or 8 cm) from top to bottom, which while not large and not a significant safety risk does offend my sensibility. A few of my ham friends call me a perfectionist, and that is not necessarily intended as a compliment.
A local tower pro after asking me how I aligned the towers offered to loan me his transit. It was an offer I could not refuse. When I was ready to do the job he handed me the instrument and suggested I search on YouTube for videos on how to use the thing.
A transit is a type of theodolite used in the building trades. Other than YouTube there are many resources on the internet that explain a transit's function, features and use. Here is one that is straight-forward and easy to follow.
I took the transit home, fiddled with it a bit and read the dreadfully poor manual. But that was enough to put it to use. Most of the features are not needed to align a tower, but can be useful to survey a plot of land for a new tower. It wasn't even necessary to turn on the power except to play with the advanced features in the comfort of my shack. Setting up the transit for tower alignment involves the following steps:
- Plunk the transit down in the field far from the tower.
- Level the transit.
- Point the telescope at the tower base centre and lock its horizontal motion.
- Rotate the telescope up and down to track deviation from a vertical line.
Levelling
This is the most critical step in setting up transit for use. It absolutely must be level. The method I was taught and that works well for me is as follows:

- Extend the tripod to working height, but not so high that you can't easily see the levels. Point one leg towards the tower so that you have unencumbered access to the telescope.
- Roughly level the tripod top by eye then firmly push the leg spikes into the ground (assuming you're not on bare rock).
- Mount the transit to the tripod. Adjust tripod legs until the bubble level (bottom) is approximately centred.
- Rotate the transit so that two adjustment knurls are at either side. Adjust the knurls to level the transit using the the linear level (top). Do it for each of the 3 positions, then repeat until the transit is level in all directions. You can usually get away with only being precise about the level for the one position where the telescope points at the tower if the only purpose is tower alignment. But don't get sloppy: get it level in all other directions as best you can.
Pick a spot
The best spot is directly opposite a guy anchor, and farther from the tower than its height. The first is to ease sighting of the tower and for left-right symmetry. The second is to keep the maximum telescope angle below 45° elevation for ease of use. Farther is better than nearer, although it requires more walking to and from the turnbuckles after each adjustment.
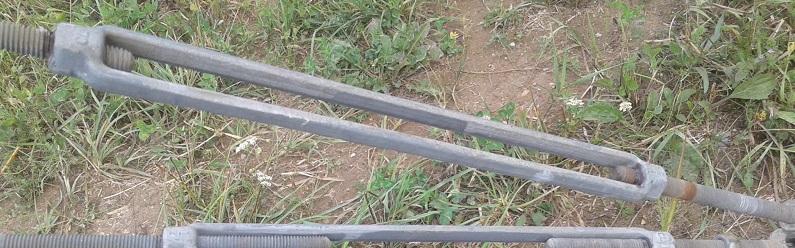
The best spot is not always available because of obstacles such as buildings and bush. Or the sun is behind the tower from that vantage point which makes sighting the tower difficult and dangerous for your eyes. An alternative is the place the transit behind a guy anchor, slightly offset so that the guys don't block sighting the near tower leg. This is shown in the adjacent picture.
When you do offset in this fashion be aware that your view of the tower is slightly rotated. The difference may be less than 1" but it will loom large in the telescope. Also, the pier pin will not be vertically aligned with the nearest tower leg. Keep that in mind as you read the section below on the alignment process.
Preparing the tower
The guys are under a lot of tension. When you adjust one turnbuckle the tension of other guys at that level and especially those higher can distort the tower in unexpected ways. It is advisable to loosen all the guys equally before starting. Obviously this should not be done when the tower is heavily loaded and a storm is imminent.
The guys should not be so loose as to be slack. In my case with 5/16" EHS guys the pre-load tension is a little over 1000 lb I reduce the tension to no more than 500 lb. Do it for all guys above the lowest guy set. Leave the full pre-load tension on the lowest guys. As alignment proceeds we want the guys above the set being adjusted slack enough that they cannot distort the tower due to excess downward force. Similarly we want the guys below the set being adjusted to be at full pre-load tension.
 All that said, if alignment is for periodic maintenance and not the initial alignment of the tower you likely don't need to loosen the guys. This is because the expected lateral shift required ought to be small. For new towers I find that the initial eyeballing rough alignment can be out by several inches. With experience more than one guy level can be adjusted at a time and tension becomes less of a concern. Don't overestimate your ability and you won't make any mistakes.
Aligning the tower
Guyed towers are aligned from bottom to top. You start by aligning the lowest guy set and move upward until the top. Starting at the top or middle will only make the job more difficult so avoid the temptation. This point was impressed on me by several experts. Loosening guy tension before you begin, as recommended above, greatly aids this process.
There is a knob to lock the horizontal motion, so lock it when your aim is close. There will be another knob for fine adjustment (concentric with the lock control on mine). Swing the telescope up and check for deviation from vertical at the lowest guy station.
Estimate the lateral correction required. Loosen the turnbuckle on the side the tower leans towards, then tighten the turnbuckle on the other side the same amount. You can make a good guess at how many turns of the turnbuckle it'll take by noting the tpi (turns per inch) and doubling it (since there are two screws) and reducing the travel a bit due to the angle of the guys -- lateral motion per turn is less the higher up the tower the guy attaches; this is basic trigonometry.
For large offsets do it in steps rather than all at once. This is also good advice if you've never done an alignment before. A bit of lubrication on the turnbuckle screws helps. Turning a balky turnbuckle carrying 1000 lb of tension generates a lot of heat (and loud screeching) that can damage the threads.
When you're satisfied with the alignment do the same for the other two positions around the tower. You'll likely need to repeat the circuit once and possibly more for towers badly out of alignment. After aligning the guys at each level tighten the three turnbuckles an equal number of turns until you reach the required tension (approximately 10% of breaking strength). Use a suitable gauge that is calibrated for the guy cable you are using. If all is in order the tension should be approximately equal on all 3 guys.
Repeat the process for each higher guy set until done. You should check the alignment at lower guy stations as you go along since as each higher guy set is tightened it will place additional load on the tower that can accentuate any imperfections. Be on the watch for significant deviations since this can indicate a weak tower section or guy component.
Common difficulties
The alignment process is straight-forward but tedious. Having friends to help makes the job go much faster. I find I spend a lot of time walking between guy anchors and transit, time which can be eliminated by asking your friends to tighten/loosen turnbuckles while you operate the transit.
It is good practice to have the turnbuckle screws approximately half inside the turnbuckle to allow adequate room for future adjustment in either direction. I found that with each new tower my initial rough alignment when corrected resulted in turnbuckles at one anchor with too much screw and with too little at another anchor. Don't shirk correcting these problems.
If there is too little screw thread inside the turnbuckle or the turnbuckle bottoms out during alignment you'll need to detach the guy to reposition the screws. Use a winch or cable puller of sufficient capacity to relax tension on the turnbuckle, unwrap the guy grip, adjust the screws and reattach the guy grip. Tighten the turnbuckle until the tension on the winch relaxes and remove the winch.

Use a tensiometer to return the tension to what it was before. Then align the tower only adjusting that one turnbuckle. This is a good time to note that when you cut the guy cable be sure to leave a longer tail in case you need it after alignment and repositioning a turnbuckle. You can cut it closer after the alignment is complete.
 If you are uncertain whether the grip is safe to reuse replace it; they aren't expensive. I will reuse them once, but not twice, and only when the strands are not distorted and there is lots of grit remaining. From my own experience and those I've spoken to in the business no one can recall a grip failing on its second use. Guy grips are tougher than they look. However none of this guarantees that a reuse failure cannot happen.
Between guy stations the tower sections may not track in a straight line. Assuming that this is not due to damage (corrosion, metal fatigue, failed weld, etc.) and the deviation is large enough it is worthwhile to correct it. The problem is typically due to a section splice in which the bolt holes on one or more legs were not properly aligned when bolted.
Correction involves slightly loosening the bolts so that the vertical force seats all the splice bolts in the same position. Unfortunately the opposite can occur in some cases. I've done it though I'll admit it makes me nervous. Just be very certain the deviation is not due to damage. Better, call in an expert to do or supervise the work. In a guyed tower damage or deviations are more dangerous the lower they are on the tower, which is opposite to the expectations of many hams.
Finishing the guying
Guy components will relax when first put under full tension. For example, grips conforming to the shape of insulators and thimbles. The tower will drift out of alignment within days. For this reason professionals return to a tower a few days or weeks later to redo the alignment. We should do the same. It is worth the trouble even if money must be spent to rent a transit.
When you are satisfied that the tower is properly aligned and the steel has settled into its final shape you should add safety cables to the turnbuckles at each anchor to prevent them from turning under load and keeping the tower upright if a turnbuckle breaks. Clean and paint them to keep them in good working order.
As part of station general maintenance check alignment at least once each year. Do not rely on adjusting guy tension alone since, while indicative of potential trouble, tension changes don't tell you what has specifically happened.
No comments:
Post a Comment
All comments are moderated, and should appear within one day of submission.