In this article I'll recount the key points in the construction and what I learned along the way. At least some of this should be useful to others.
Help arrives
I demurred on continuing with the tower project alone when I had 7 sections raised and 2 more to go. Doing it alone necessarily involves at least 3 trips up and down the tower. The risk multiplies as the tower rises: there is more opportunity to make mistakes and the additional physical effort makes one tired and more prone to mistakes.
Luckily an experienced tower climber was willing and able to drive out to help me with the project. So I waited for him to be available. That ham was Vlad VE3JM, a dedicated contester with his own substantial antenna farm and contest station east of Ottawa.
 |
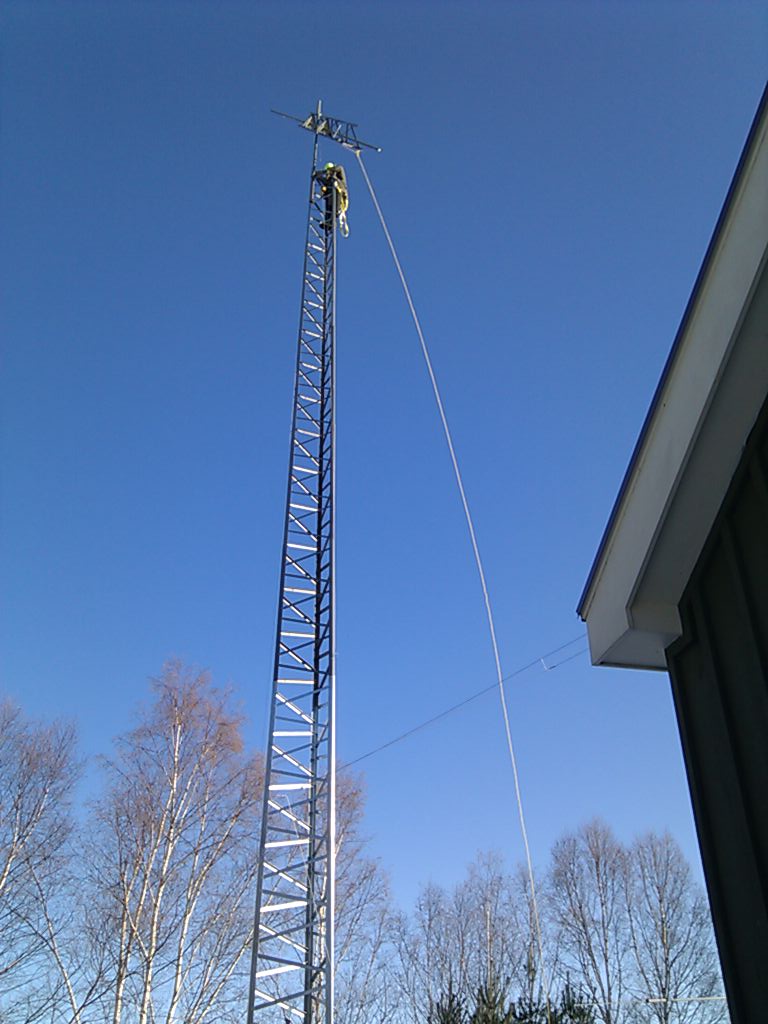
| -4° C and a north wind: a perfect day for tower work |
Unconventional lift
The penultimate section (#5) went up without an issue, just like all those that preceded it. The only thing different about it is that at the top was a plate recently drilled for the Tailtwister rotator. It was the next section that presented a challenge.
Over tea Vlad and I reviewed several alternatives:
- Raise the 4T in the usual way, then add an extension to the gin pole to lift the mast above the tower and drop it in.
- Add an extension to the gin pole and lift the 4T with two bearings and the mast installed in its intended position.
- Use the gin pole as is and lift the 4T and mast together but with the mast projected below the section so that the centre of gravity is below the highest point the gin pole can attach: 6.5', or 2 meters above the section the gin pole is sitting on.
 |
| VE3JM preparing to grab the 4T+mast assembly |
The mast was inserted through the 4T on the ground and moved down until the centre of gravity was far enough below where the winch cable attached that the assembly would reliably hang somewhat vertically. When we did this the mast protruded 3' (1 meter) below the bottom of the 4T. The mast was locked in place with a muffler clamp so that it could not slide down.
The assembly weighed ~100 lb (45 kg), which was well within the proven capacity of the winch, cable and gin pole. So up it went, with me on the winch and Vlad on the tag line to keep it from tangling with the tower and gin pole. It was quite a sight! When we had the behemoth dangling above the tower 70' in the air Vlad climbed up for the next step.
His task was to pull the leaning assembly inward, push the 50 lb (23 kg) mast up through the bearings and tower top, swing it over the tower and lower the mast through the empty rotator plate. Sound like fun? It turned out surprisingly well. Once that maneuver was complete I lowered the section for Vlad so that he could fit the section in for splicing.
It was only then we had some difficulty. I was prepared for a tight fit since I had spliced these sections on the ground to ensure proper section alignment after performing repair work, including replacement on one leg on both the 5 and 4T sections. The problem was exacerbated when the gin pole pulley jammed against a tower leg and wouldn't allow completion of the splice.
I joined Vlad up the tower to free the jammed gin pole and fight with the tight fit of the section splice. With the two of us working together the job was done. We descended, cleaned up and shared a tea before he returned to his family and holiday activities.
Installing the rotator and rigging for lifting the yagis
A few days later when the weather was decent I went up the tower to take care of several tasks. Considering the number of things to be done I did well in getting it all done in one climb. The work was physical enough that even though the temperature was below freezing and cloudy I stayed comfortably warm even while working without gloves.
The first task was to lift the mast several feet and hold it there so that the rotator could be slipped into place. This was more difficult than expected. Although only 50 lb and easy to pick up and carry on the ground it is another matter to stand astride the tower, reach in and lift that much weight. I had no success at all until I removed my warm gloves and gained the advantage of an improved grip. Getting cozy with that much biting cold steel is not terribly enjoyable.
When I got it above the rotator plate I covered the hole with a short length of lumber I brought up with me. This allowed me to rest before continuing the lift. I then hooked a rubber tie-down strap onto the mast, lifted again and hooked the other end of the strap onto a tower diagonal. I then hauled up the rotator and control cable by rope. This was one of two ropes I had taken up with me.
I fished the cable and connector through the plate, lifted the mast once more and slid the rotator underneath and dropped the mast into place. Unfortunately I then had to pry up the 70 lb of rotator and mast to align the rotator mounting holes with the drilled plate, slip in a spacer and drive home one bolt. With the rotator now pinned the other 5 spacers and bolts went easier.
After tightening the clamp I taped the control cable to tower, plugged it into the rotator connector and weatherproofed the connection. Climbing up I centred and tightened the two mast bearings onto the mast. With that done the mast and rotator installations were complete and it was time to set up the rigging for lifting the yagis.
I transferred the pulley from the gin pole to a mast clamp and lowered the gin pole to the ground on the rope with which I pulled up the rotator. The next step is one that many hams prefer to avoid. I stood up on top of the tower, strapped to the mast.
 After surveying the landscape and enjoying the unobstructed view I got to work on the rigging. The winch pulley was raised to several feet above the tower and the clamp tightened. The winch would be used to lift the XM240 which weighs at least 70 lb. This antenna is normally 55 lb but this one has been improved for survivability (W6NL mods) by its previous owner who, interestingly, never did put up the antenna.
I retrieved another clamp and pulley from my tool pouch and reached as high as I could (~7') and tightened it onto the mast. I then threaded the second rope I brought with me through the pulley and down to the ground. This pulley is for the Explorer 14 tri-band yagi. These antennas are to be my main antennas for the next several months until serious tower work recommences in the spring.
I snapped a selfie of my feet and the ground below and started my descent. As I descended I taped the control cable to the tower at intervals. In our winters it is vital to use good quality electrical tape that can be manipulated in cold weather. Cheap tape becomes brittle and unworkable in the cold.
Down on the ground I tidied up and went inside to connect the controller to the cable and test the rotator. That was a solid day of work and excellent progress. The antennas came next. There was another delay because of the weather and time needed to complete yagi assembly and the feed systems.
Lifting the yagis
Vlad returned a week later to help with lifting the yagis. Over several days between Christmas and New Years Day I assembled the antennas, built the feed systems and tested various lengths of coax for use in the rotator/drip loops and transmission lines. I encountered several problems along the way though nothing serious.
The modified XM240 took several attempts until I had the elements and feed system correctly positioned and oriented. The cold temperatures made this challenging since fingers get clumsy and numb while kneeling in the snow and manipulating tiny screws and nuts. The capacity hats were left off until the antenna was lifted since they are too fragile to rest on the ground.
Much of my RG213 coax is 30 years old and spent many years partly buried. Although it served me well at my most recent Ottawa QTH some testing was in order. Here is what I discovered:
- Loss was greater than spec. At 28 MHz the several 40 meter lengths had a measured loss of around -1.9 to 2.0 db. This compares to -1.5 db for new RG213. That isn't bad for old coax.
- The characteristic impedance had dropped to around 46 to 47 Ω. This results in a slightly elevated SWR though, again, nothing worth worrying about.
- One length of coax had a DC short. This was unexpected since it worked well just last year.
- The coax I ran off the 1,000' reel (I still have some of the original coax unused) measures right on 50 Ω, so I assume the impedance dropped with age due to chemical or physical deterioration.
With everything prepared Vlad and I had to get everything done in a few hours before sunset. We didn't get everything done, but we did get both yagis lifted and mechanically attached. The tri-bander was lifted first since it goes on top. At only 45 lb this is a one man lift with a rope. However as with the mast it was made difficult by the need for gloves and the stiff and slick nylon rope. Vlad climbed up and fought for a while with the Hy-gain boom-to-mast clamp. There are lots of bolts to deal with.

After checking out the antenna with an analyzer he came down and we raised the XM240 with the winch. I had moved the gin pole pulley over to the mast several days earlier. The capacity hats went on with the yagi a few feet off the ground. With a 22' boom and 43' elements it took some effort to keep it out of the trees for the bottom portion of the lift. Tag lines were used on both yagis since there are many protrusions on the antennas that easily tangle with the tower.
One problem we discovered is that the 2" galvanized muffler clamps I had just purchased were of slightly different manufacture and did not quite fit the machining of the custom boom plate. We wasted time elongating the holes with a round file, finally opting to squeeze the u-bolts and hammer with our gloved hands! Steel is harder than aluminum so the threads were not ruined.
That's as far as we got. It was up to me the next day to go up the tower and complete the job. This involved installing and adjusting the XM240 boom truss, testing the XM240 with an analyzer, pushing the Explorer 14 to its intended height and removing all the lifting pulleys. Once that was done the transmission lines were lifted, the rotator/drip loop attached and weatherproofed, and finally, on the way down, taping the coax to the tower.
And finally...
 I am back on the air. Finally. However there are difficulties which I am looking into. One of these is that the rotator has cut out a couple of times for no obvious reason. Jiggling the wires up the tower fixed the problem which, if not merely a coincidence, indicates trouble with the wiring harness or connections. This is long run of cable which has given problems in the past, but it is all I have on hand for the moment.
Another problem is that the XM240 is not resonating per the assembly instructions. At first I assumed I'd made an error until another ham mentioned having the exact same problem, with the very same measurements. So for the moment it resonates in the lower part of the SSB segment on 40 meters (~7.125 MHz) and requires a tuner at the low end of the CW segment. I was amused when we got freezing rain the next day and resonance dropped to 7.025 MHz. But I can't rely on ice storms to properly tune my antennas.
As you can see in the picture there is some misalignment in the yagis. While it looks sloppy it is inconsequential. There is only so much fussing one can do in the cold weather. It'll do. The tri-bander is a little lower than I'd planned, with only 2 meters separation between yagis; interaction on 15 meters is my concern.
At least I have something. It is a joy to effortlessly work over the pole into Asia and crack through small pile-ups. The shack is very temporary because I have to keep the cables away from the construction zone beside my house to avoid damage. I will be putting up a simple antenna for 80 meters to get me through the winter. I can use the XM240 on 17 meters even without a tuner since the SWR hovers between 2 and 2.5. However I have nothing usable on 30 meters or 160 meters unless I put up more wire.
I will have more to say about my plans for 2017 and why I've made the choices I have in my current temporary arrangement, and say more about the problems I encountered. For the present, happy new year and I hope to see all of you on the air and in the upcoming contests.
Surprised you don't know (or didn't think of) yet a FOURTH option. And it's far easier & safer than 1-3 IMHO. You install the mast first, once you have "enough" tower sections together. It then rests comfortably on the concrete base until you are ready for it. Then it can be lifted up inside the tower & inserted through the thrust bearing from the bottom. A muffler clamp against the bearing safely holds it in place. A forged eye threaded on to one of the thrust bearing bolts provides a safe & plumb attachment point for a comealong, used to raise the mast as-needed. Especially useful in stacking beams on the mast. Then the rotator is lifted & put in position. Two bearing will allow easy removal, etc. On the "angle iron" style construction, I use/recommend wire ties to secure cabling, not tape. Much more tension that way.
ReplyDeleteIt's a good blog; I enjoy reading about your efforts. vy 73 Don K4ZA
Tower Works Charlotte NC
Antenna Towers for Radio Amateurs, published by ARRL
Don, you are absolutely right. I've used that technique many times. I just didn't think to insert the mast early enough during construction. Hence the remaining options open to us.
ReplyDelete73 Ron VE3VN
Awesome work, Ron!
ReplyDeleteCongratulations and thanks for sharing
73 de VE4EA